
-
Dolphin Web SolutionShopwareGuide to Create a Shopware App: Step-by-Step Tutorial
 30 Min
Guide to Create a Shopware App: Step-by-Step Tutorial


Table of Contents
 Show
Show

Summary :
Delving deeply into the structure setup and product release aspects of developing a Shopware application, requires discipline and a step by step process. In this article, you will find a comprehensive guide that begins with setting up the development environment and required tools. By the end of this article, add a simple Shopware app, and include additional features to enhance functionality. The end goal is to have an operational Shopware app at your disposal.
Why Create a Shopware App ?
In less than a decade, e-commerce services have been gaining traction due to adoption of technology and its value. There is no doubt that today’s times are roller coaster advancements. Each moment new ventures are opened, and so, it comes as no surprise that new opportunities, products, and even markets will always have a scope. This being said, for the diverse problems and changes which take place around the globe, they necessitate flexible and scalable solutions for businesses. Shopware is one of the best and leading shopping cart solutions in the web which uses two main ways of surpassing its functionality which are plugins and apps.
Shopware apps are preferred for cloud, API and extensive reach customizations which are far less efficient with plugins, as they deeply integrate with the core of Shopware. However, traditionally plugins are just easy. In the following guide, we will see the reasons on why you should build a Shopware app, its strengths and limitations compared to a more orthodox plugin approach.
What is a Shopware App?
A Shopware app is an outside service that connects to a Shopware store via APIs and webhooks. Unlike plugins which alter the internal features of Shopware by adding or removing its core functions, apps are independent of the platform and as a result, they are more secure, scalable, and cloud friendly.
Apps use the following for communication with Shopware:
- REST API for data (products, orders, customers, etc.)
- Webhooks for store event reactions (for example, order placed or product update)
- App System for UI component integration within Shopware’s administration panel
This method of construction helps to ensure that the apps remain compatible with the self-hosted and cloud environments, upgrade friendly and future proof with no changes done to the Shopware core
Why Create a Shopware App?
Developing a Shopware app allows businesses to extend their store’s capabilities without altering the core system. Here’s why you should consider building an app:
1. Cloud Compatibility
- Shopware apps are fully compatible with cloud environments, unlike plugins that require direct file access.
- You can build SaaS-based solutions that work across multiple Shopware stores.
2. Secure & Scalable
- Apps run on external servers, ensuring better security and performance compared to plugins that execute inside the Shopware system.
- This reduces server load, making apps a scalable solution for high-traffic stores.
Step 1 : Create a Shopware App (Manually & Using CLI)
There are Two ways to create a Shopware app:
- Manually – Setting up the necessary files and configurations yourself.
- Using the Command Line (CLI) – Generating the app structure with a single command for efficiency.
Method 1: Creating a Shopware App Manually
Understanding the Shopware Directory Structure for Apps
Before creating a Shopware App, it’s important to understand where and how it fits into the Shopware directory structure. Shopware provides an organized folder system where you can develop and manage custom apps.
A Shopware app is not placed directly inside the Shopware core directory but rather in a separate custom folder to maintain modularity and prevent conflicts with core updates.
Step-by-Step Breakdown of Directory Structure
1. Shopware Root Directory
When you install Shopware, your project structure looks like this:
/shopware-root
├── bin/
├── config/
├── custom/
│ ├── apps/ # This is where your Shopware apps go
│ ├── plugins/ # This is where Shopware plugins go
│ └── static-plugins/ # Other project-specific
├── public/
├── src/
├── vendor/
├── composer.json
└── .env
Here’s what the important directories do:
- bin/– Contains executables and CLI scripts for Shopware.
- config/– Stores system-wide configurations.
- custom/– The main directory for custom extensions.
- custom/apps/– This is where Shopware Apps reside.
- custom/plugins/– This is for traditional Shopware plugins.
- custom/static-plugins/– Used for project-specific development.
- public/– The public-facing directory where assets, storefront templates, and entry points exist.
- src/– Contains core framework files for Shopware.
- vendor/– Stores third-party dependencies from Composer.
- .env– Stores environment configurations like database credentials.
2. Navigate to the Custom Apps Directory
To create a new Shopware App, we work inside the custom/apps/ directory.
Navigate to it:
$ cd shopware-root/custom/apps/
Create a new directory for your app:
$ mkdir MyShopwareApp
$ cd MyShopwareApp
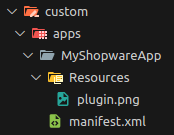
At this point, your app folder structure should look like this:
/custom/apps/
└── MyShopwareApp/3. Inside the App Folder ( MyShopwareApp )
Creating the manifest.xml Inside the MyShopwareApp Folder
Navigate to the App Directory
$ touch manifest.xml
Edit the manifest.xml File
Populate it with the necessary metadata:
MyShopwareApp A description Your Company Ltd. (c) by Your Company Ltd. 1.0.0 Resources/plugin.png MIT 1. Verify the App in Shopware Admin
- Log in to your Shopware admin panel.
- Navigate to Extensions > My Extensions.
- Locate MyShopwareApp in the list.
2. Install and Activate the App
- Click Install next to your app.
- After installation, click Activate to enable the app.

Note: There’s no need to upload a ZIP file in the admin extension upload. Once the app’s folder with a valid manifest.xml is in the custom/apps/ directory, Shopware recognizes it, allowing you to install and activate the app directly from the admin panel.
Also Read:
Top 10 Shopware Development CompaniesMethod 2: Creating a Shopware App Using CLI (Command Line)
Shopware provides a CLI (Command Line Interface) for managing apps efficiently. This method is useful for quickly generating the required structure, including the manifest.xml file, without manually creating folders and files.
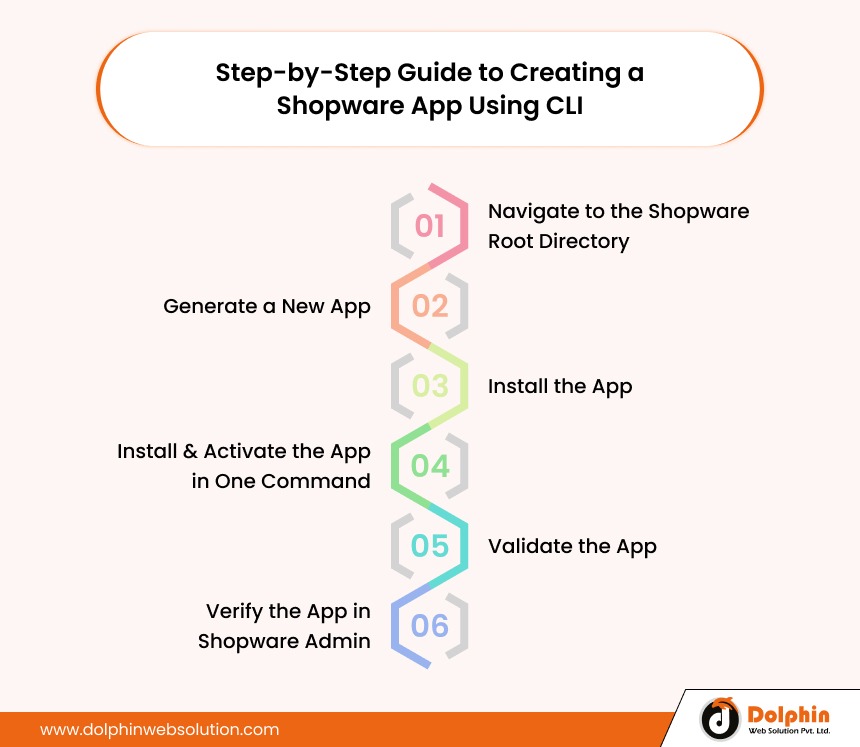
Step-by-Step Guide to Creating a Shopware App Using CLI

1. Navigate to the Shopware Root Directory
Open your terminal and move to the root of your Shopware project:
$ cd /path/to/shopware2. Generate a New App
Run the following command to create an app:
$ bin/console app:create MyShopwareAppThis command will prompt you for the following optional information (press Enter to skip any field):
- Label: Display name of the app
- Description: Brief details about the app
- Author: Your name
- Company: The company name (if applicable)
- Copyright: Copyright information
- Version: The app version (e.g., 1.0.0)
- Relative path to app icon: Path for the app icon (optional)
- License: License type (MIT, GPL, etc.)
Once completed, Shopware will generate the necessary app structure inside custom/apps/MyShopwareApp/, including the manifest.xml file.
3. Install the App
To install the newly created app, run:
$ bin/console app:install MyShopwareApp
4. Install & Activate the App in One Command
If you want to install and activate the app simultaneously, use:
$ bin/console app:install MyShopwareApp -a
Or
$ bin/console app:install MyShopwareApp --activate
Or activate after install cli
$ bin/console app:activate MyShopwareApp
5. Validate the App
To check if the app is properly structured and contains no errors, run:
$ bin/console app:validate
This will validate all installed apps. If you want to validate only a specific app, use:
$ bin/console app:validate MyShopwareApp
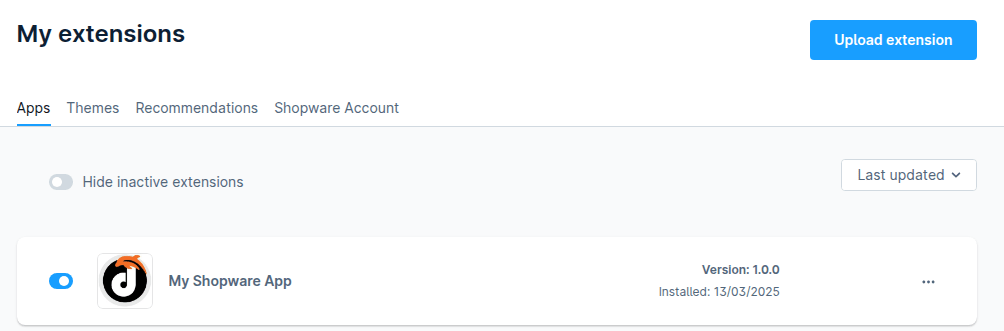
6. Verify the App in Shopware Admin</H5>
Once installed, you can check your app in the Shopware Admin:
1. Go to Extensions > My Extensions
2. Locate MyShopwareApp in the list
3. If not activated, enable it from the admin
Generated manifest.xml Example
After using the CLI command, the manifest.xmlfile inside custom/apps/MyShopwareApp/will look something like this:
MyShopwareApp A description Your Company Ltd. (c) by Your Company Ltd. 1.0.0 Resources/plugin.png MIT Shopware Admin Extensions Page

Step 2 : Creating an App Server using Symfony and the Shopware App Bundle
Introduction
To enable communication between your Shopware store and your custom app, you need an app server. The app server acts as a bridge, handling API requests, authentication, and data exchange. Symfony, a powerful PHP framework, is an ideal choice for building this server due to its flexibility and robust ecosystem.
In this guide, we will walk through setting up a Symfony-based app server and integrating the Shopware App Bundle to facilitate Shopware’s app registration and communication.
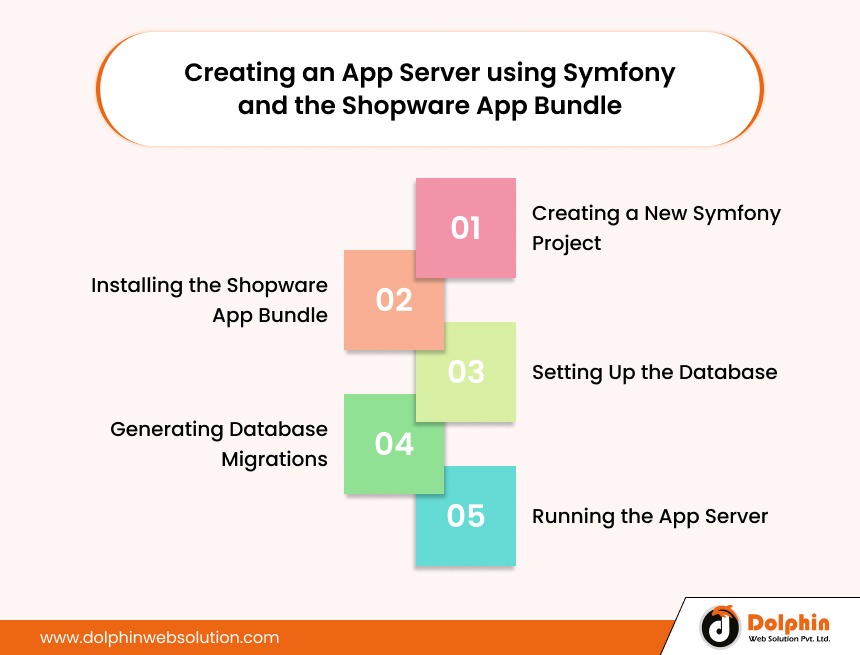
1. Creating a New Symfony Project
First, create a new Symfony project using the Symfony Skeleton setup. Open your terminal and run the following command:
composer create-project symfony/skeleton:"7.2.*" my-app
This command sets up a minimal Symfony project named my-app. Symfony Skeleton provides only the essential packages, allowing you to add the necessary components as needed.
Once the project is created, navigate into the project directory:
cd my-app
2. Installing the Shopware App Bundle
The Shopware App Bundle provides essential tools for registering and authenticating your app with a Shopware store. Install it using Composer:
    composer require shopware/app-bundle
    composer require doctrine/orm symfony/doctrine-bridge
This will add the required dependencies to your Symfony project, making it compatible with Shopware’s app system.
3. Setting Up the Database
Your app server requires a database to store Shopware registration details and other necessary information.
3.1 Creating the Database
Create a new database named myApp (or any other name of your choice) in MySQL.
You can do this using the MySQL command line:
CREATE DATABASE myApp;
Alternatively, if you are using a tool like phpMyAdmin, create a new database manually.
3.2 Configuring the Database Connection
Next, open the .env file in your Symfony project and update the DATABASE_URL parameter with your database connection details:
DATABASE_URL=mysql://root:Admin@localhost/myApp
Ensure that:
- root is your MySQL username
- Admin is your MySQL password (replace it with your actual password)
- localhost is your database host (change it if needed)
- myApp is the name of your database
4. Generating Database Migrations
To create the necessary database tables, you need to generate and run migration files.
4.1 Install Required Packages
Run the following commands to install the Maker Bundle (for generating migrations) and Doctrine Migrations (for handling migrations):
composer require symfony/maker-bundle --dev
composer require migrations
4.2 Generate Migration Files
Once the necessary packages are installed, generate the migration files:
bin/console make:migration
This command creates a new migration file in the migrations/ directory, containing the necessary schema changes.
4.3 Execute the Migrations
Run the migration to apply the changes to your database:
bin/console doctrine:migrations:migrate
Once executed, this will create the required tables in the myApp database, including the ones needed for Shopware registration details.
5. Running the App Server
Once everything is set up, start the Symfony development server with the following command:
symfony server:start
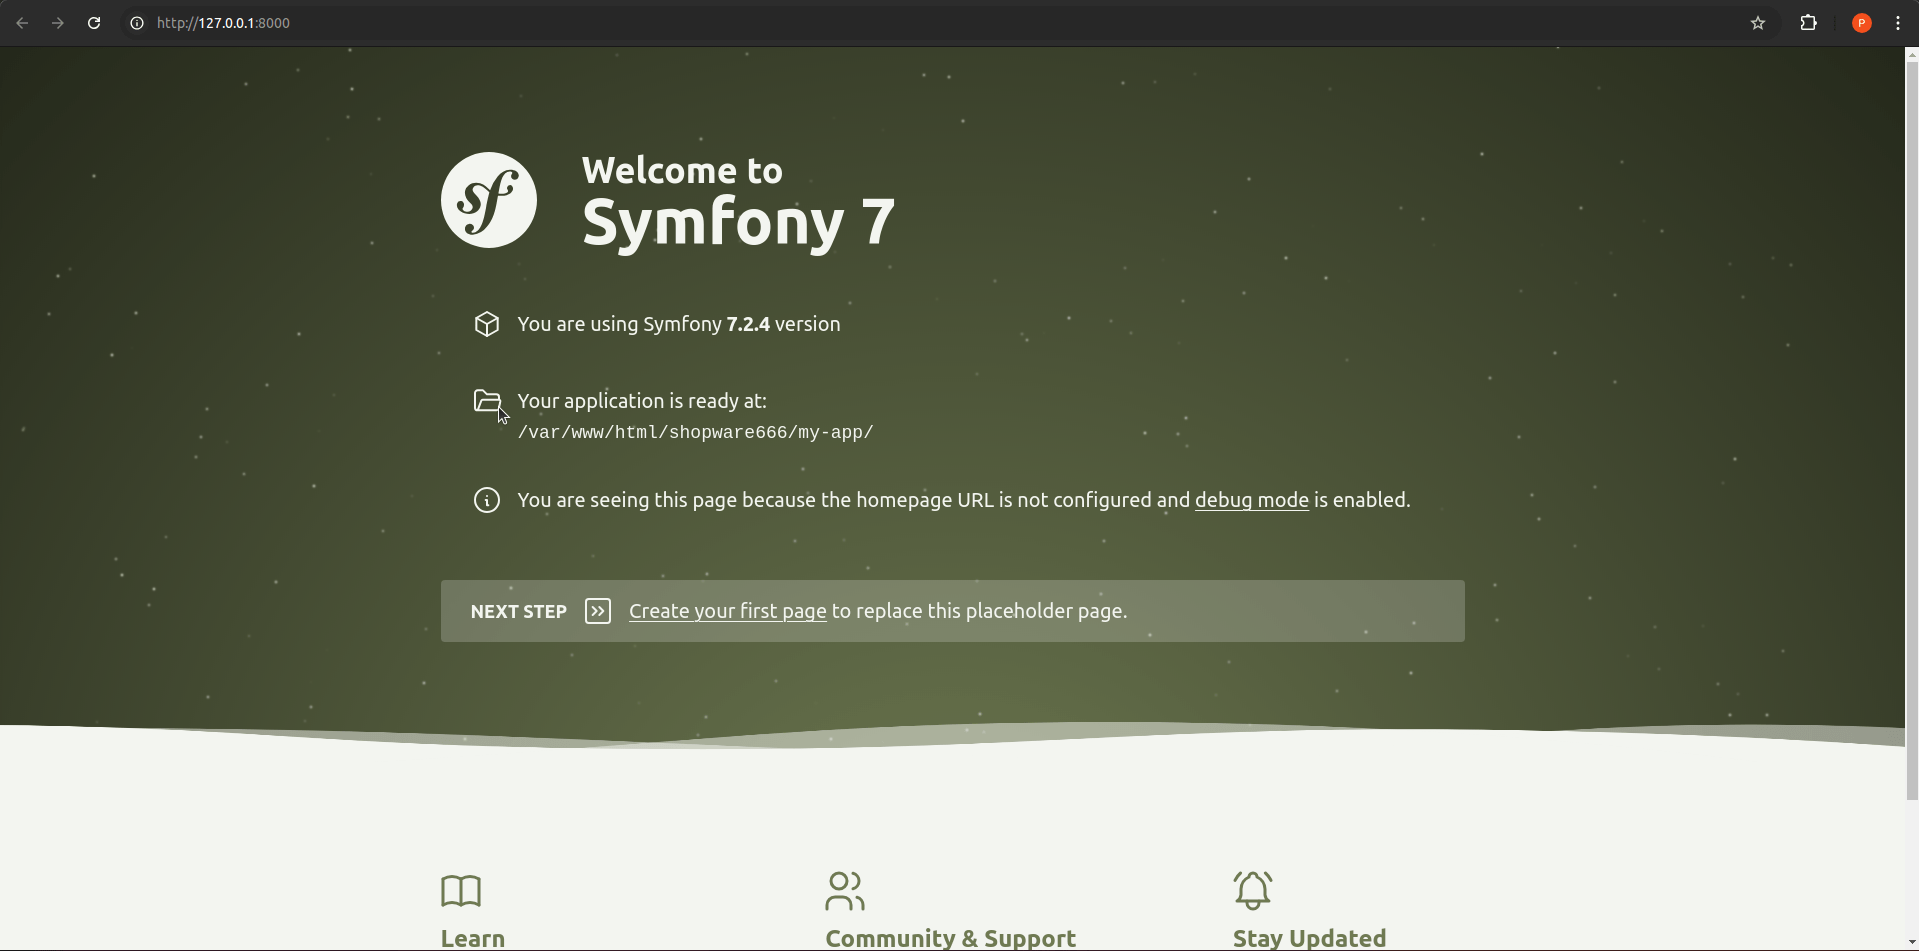
By default, this will start the server at:
http://127.0.0.1:8000
You can now access your Symfony app in the browser. This server will handle Shopware authentication and API requests.
Step 3 : Connecting Shopware and App Server
Introduction
In order to facilitate communication between your custom app and your Shopware store, you require an app server. The app server serves as an intermediary, processing API calls, authentication, and data transfer. A great choice to construct the server is Symfony, a fast PHP framework that’s highly flexible and has a good ecosystem.
In this tutorial, we will guide you through installing a Symfony-based app server and integrating the Shopware App Bundle to enable Shopware’s app registration and communication.
1. Updating the Shopware App’s manifest.xml
Locate the manifest.xml file inside your Shopware app directory. This file contains essential configurations for the app, including the registration URL and security settings.
1.1 Add Registration URL and Secret
Inside the setup section of manifest.xml, add the following lines:
http://127.0.0.1:8000/app/lifecycle/register
    TestSecretCode
Explanation:
- registrationUrl: This defines the endpoint where Shopware will send the registration request when installing the app.
- secret: A shared secret key used for authentication between Shopware and the app server.
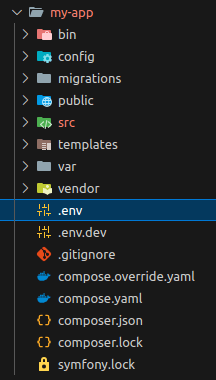
2. Updating the App Server Environment File (.env)
To allow the app server to authenticate Shopware requests, you need to configure it with the same app name and secret that were set in the manifest.xml file.
2.1 Open the .env File
Navigate to your Symfony app server project and open the .env file.
###> shopware/app-bundle ###
SHOPWARE_APP_NAME=MyShopwareApp
SHOPWARE_APP_SECRET=TestSecretCode
###< shopware/app-bundle ###
Explanation:
- SHOPWARE_APP_NAME: This should match the name of your Shopware app.
- SHOPWARE_APP_SECRET: This must match the secret key defined in manifest.xml to ensure secure communication.
3. Applying Changes by Reinstalling the Shopware App
After making these changes, you need to reinstall the Shopware app or clear the cache for the updates to take effect.
3.1 Reinstall the App Using CLI
Run the following command inside your Shopware project to reinstall the app:
bin/console app:install MyShopwareApp --activate
Alternatively, you can deactivate and reactivate the app from the Shopware Admin Panel under Extensions > My Extensions.
3.2 Clear Cache (If Necessary)
If the changes are not reflected, try clearing the cache using the following command:
bin/console cache:clear
4. Verifying the Connection
After reinstalling the app, you can verify that Shopware has successfully registered with your app server.
4.1 Check the Shop Table in the App Server Database
Since the Shopware App Bundle automatically stores registration details, you can check the shop table in your app server’s database.
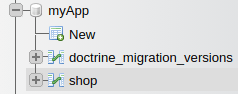
Run the following SQL query to verify:
SELECT * FROM shop;
If the connection is successful, you should see an entry containing details about your Shopware store.
Conclusion
Creating an app is the most straightforward way of customizing and extending the capabilities of Shopware. For this, you can define options in the manifest file, manually or through a command line, set the app skeleton, and for advanced functionalities, attach an app server with Symfony. You already know how to create, install, and activate a Shopware application, perform CLI checks, and configure an app server to augment functionality.
Thanks to the integration of Shopware with the app server, more complex and comprehensive applications can be developed. Apart from API integrations and other customizations, further enhancements are needed to meet the user expectations.

Nimesh Patel


Nimesh Patel is the Managing Director of Dolphin Web Solution, a global eCommerce, AI, and software development company helping businesses accelerate digital growth. With over 15 years of experience in technology consulting and product development, he has successfully guided startups, SMBs, and enterprise organizations in building scalable digital solutions. Nimesh specializes in eCommerce development, custom software solutions, mobile application development, and digital transformation strategies. Throughout his career, he has worked closely with businesses across retail, healthcare, automotive, manufacturing, and technology sectors, helping them leverage modern technologies to improve operational efficiency and customer experiences. As a business leader, Nimesh is passionate about innovation, entrepreneurship, and helping organizations turn ideas into successful digital products. His insights focus on eCommerce growth, AI adoption, software development trends, and business transformation through technology.

We can help you with
- Dedicated Team
- Setup Extended Team
- Product Development
- Custom App Development
Our Offices

AHMEDABAD (INDIA)
B- 203-206, Empire Business Hub, Science City Road, Sola, Ahmedabad – 380060

BERLIN (GERMANY)
Badensche Str. 28, 10715 Berlin, Germany

CALIFORNIA (USA)
9601 Reseda Blvd, Apt#223, Northridge CA-91324, USA

ALBERTA (CANADA)
302 Skyview Ranch Drive NE, Calgary, Alberta, Canada T3N0P5





Hello!
Click one of our contacts below to chat on WhatsApp