How to Change Logo in Magento 2

This article will explain how to change the logo in Magento 2. Let’s find out how you can do it.
A logo is a brand’s first visual representation. We’ve never seen a website that didn’t have a logo or a favicon icon. Magento 2 allows you to easily and quickly update the logo in the header, transactional emails, and invoices.
However, the logo sizes for each of them change. To update the logo, simply follow three simple steps. We’ll show you how to make this modification.
Step-1: Upload the Logo
- The first step is to upload your logo from the admin page of the store. The height and location of the logo in the header can be determined by the subject of the store.
- Your logo can be saved as a GIF, PNG, JPG, or SVG file format and uploaded via your store’s admin panel. In the sample data, the default Magento logo is an SVG file, which is a scalable XML-based vector graphic format.
- At this time, the logo will be uploaded to the server at app/design/frontend/[Vendor]/[Theme]/web/images/logo.svg
- If you don’t know the size of your theme’s logo or any other picture, open the page in a browser, right-click the image, and inspect the element.
Step-2: Upload the frontend logo in Magento 2
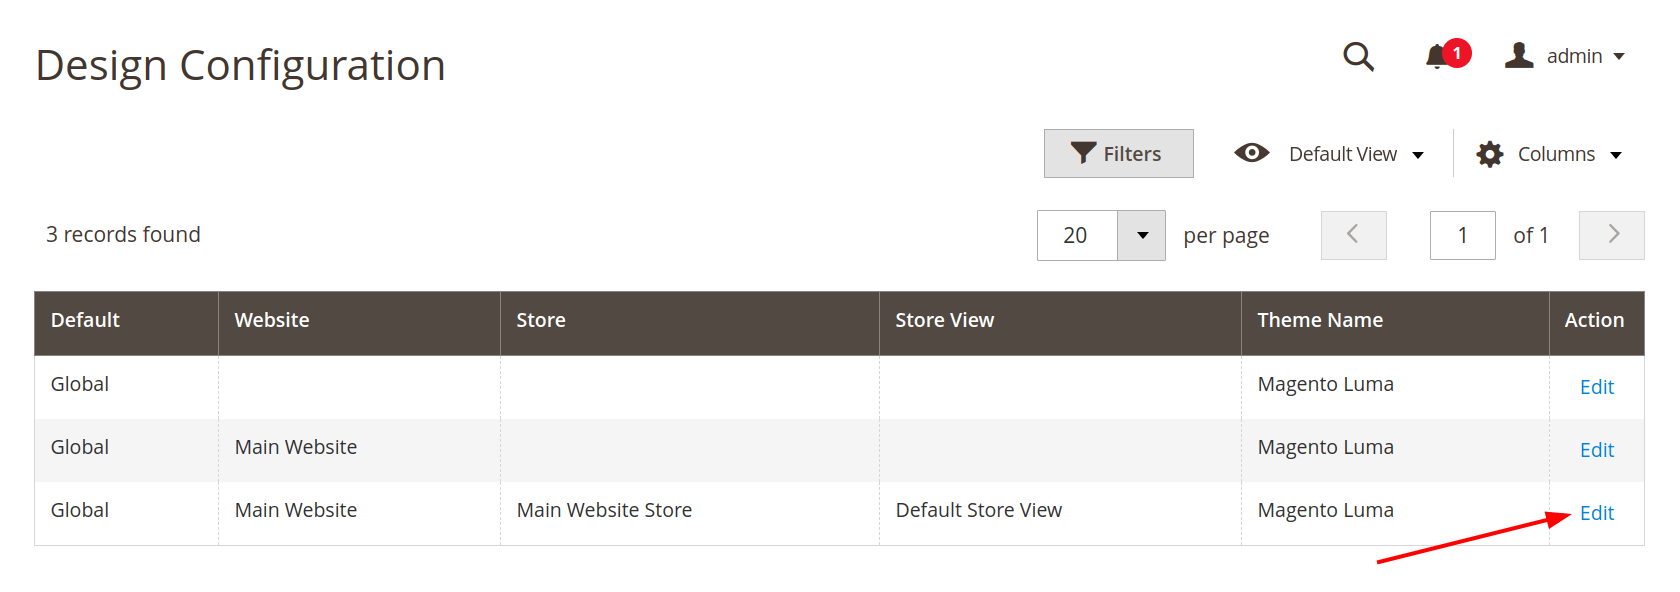
- Go to the Magento admin panel and click on Content -> Design -> Configuration in the admin sidebar and go to Design Configuration.
- The Design Configuration appears below the image Find the store view to configure the logo and click on Edit in the Action column.
- To change the Default Theme, choose your theme in the Applied Theme field that you want to apply to the view. By default, There are 2 themes in Magento 2: Magento Black and Magento Luma.
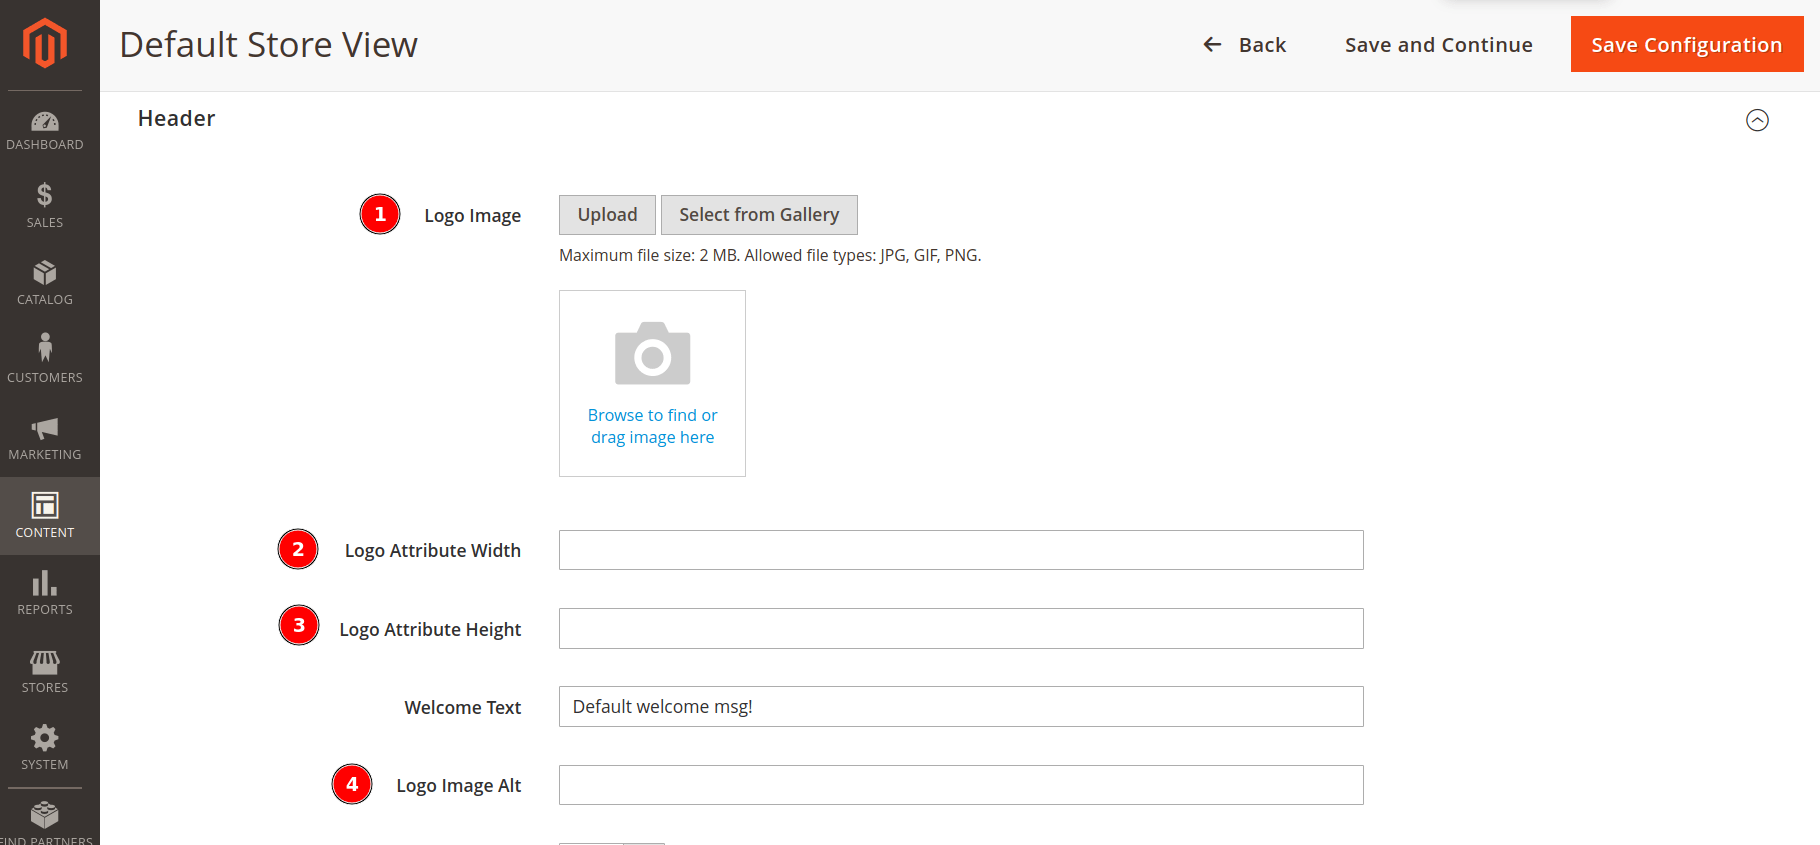
- Expand the Header section.
- Logo Image: To upload a new logo, click the “Upload” button and navigate to the file on your computer.
- Logo Image Width: Enter the logo’s picture width in pixels or leave it by default.
- Logo Image Height: Enter the logo’s picture height in pixels or leave it by default.
- Logo Image Alt: Enter the text that should appear when someone hovers their mouse over the image.
Step-3: Save and Check the Result
- When completing the above steps Click on Save Configuration you can see the logo has changed to the website.
That’s it! I hope this technical blog will help you find what you were looking for.
If you have any further questions about the change logo in Magento 2 or if you need any help from our Magento 2 expert, contact us now for a free consultation.
Bookmark it for your future reference. Do comment below if you have any other Questions.
P.S. Do share this note with your team.

Hello!
Click one of our contacts below to chat on WhatsApp


