Add Custom Validation To System Configuration Field In Magento 2

we will see together how to add a custom validation rule to a system configuration field.validation is the process of ensuring that user input is clean, correct, and useful.Validation can be defined by many different methods, and deployed in many different ways.Server side validation is performed by a web server, after input has been sent to the server.Client side validation is performed by a web browser, before input is sent to a web server.
Magento 2 provides some default built-in classes to validate system configuration fields. E.g. required field, validate non-negative numbers, validate-number,validate-number-range,validate-one-required-by-name etc.
System configuration file with a text field and a custom validation rule called validate-mobile-number-digit. Meaning that the rule will validate out field if the value entered is greater than 10.
Steps to Add Custom Validation To System Configuration Field In Magento 2
We are already learned how to create a basic module in Magento 2. We need to create module.xml and registration.php files. You can create module.xml and registration.php from this tutorial.
Here we are using Dolphin as Vendor name and InvoiceEmail as the name of the module. You can change this according to your Vendor and Module name.
Step 1: Create System XML
Create system config file system.xml in app/code/Dolphin/InvoiceEmail/etc/adminhtml folder with the following code.
<?xml version="1.0"?>
<config xmlns:xsi="http://www.w3.org/2001/XMLSchema-instance"
        xsi:noNamespaceSchemaLocation="urn:magento:module:Magento_Config:etc/system_file.xsd">
    <system>
        <tab id="dolphin" translate="label" sortOrder="1000">
            <label>Dolphin</label>
        </tab>
        <section id="theme" translate="label" type="text" sortOrder="1010" showInDefault="1" showInWebsite="1" showInStore="1">
            <label>Theme</label>
            <tab>dolphin</tab>
            <resource>Dolphin_InvoiceEmail::theme_config</resource>
            <group id="setting" translate="label" type="text" sortOrder="10" showInDefault="1" showInWebsite="1" showInStore="1">
                <label>General</label>
                <field id="custom_validation" translate="label" type="text" sortOrder="10" showInDefault="1" showInWebsite="1" showInStore="1">
                    <label>Custom Validation</label>
                    <validate>validate-mobile-number-digit</validate>
                </field>
            </group>
        </section>
    </system>
</config>
The magento 2 system configuration page is divided logically into a few parts: Tabs, Sections, Groups, Fields.
Step 2: Create requirejs-config
Add our custom validation rule we will need to extend the default Magento 2 validator js using a mixin in our requirejs-config.js
Create requirejs-config file requirejs-config.js in app/code/Dolphin/InvoiceEmail/view/adminhtml folder with the following code.
var config = {
    config: {
        mixins: {
            'mage/validation': {
                'Dolphin_InvoiceEmail/js/admin-config/validator-rules-mixin': true
            }
        }
    }
};
A mixin is a class whose methods are added to, or mixed in, with another class.
The scope of a module’s mixin depends on its directory location under the view directory. This allows you to target component instances in specific areas in Magento.
The following table maps a directory location to the application area a mixin affects:
| Directory | Scope |
|---|---|
view/frontend |
Storefront |
view/adminhtml |
Admin panel |
view/base |
All areas (unless a specific frontend or adminhtml entry exists) |
Step 3: Create validator-rules-mixin Js
Create js file validator-rules-mixin.js in app/code/Dolphin/InvoiceEmail/view/adminhtml/web/js/admin-config folder with the following code.
define([
    'jquery'
], function ($) {
    'use strict';
    return function (target) {
        $.validator.addMethod(
            'validate-mobile-number-digit',
            function (value) {
                return !(value.length < 10);
            },
            $.mage.__('Please enter a 10 digit number.')
        );
        return target;
    };
});
Now execute the below command and go to the system configuration page:
[dt_highlight color=”” text_color=”” bg_color=””]php bin/magento setup:upgrade[/dt_highlight]
[dt_highlight color=”” text_color=”” bg_color=””]php bin/magento setup:static-content:deploy -f[/dt_highlight]
[dt_highlight color=”” text_color=”” bg_color=””]php bin/magento cache:flush[/dt_highlight]
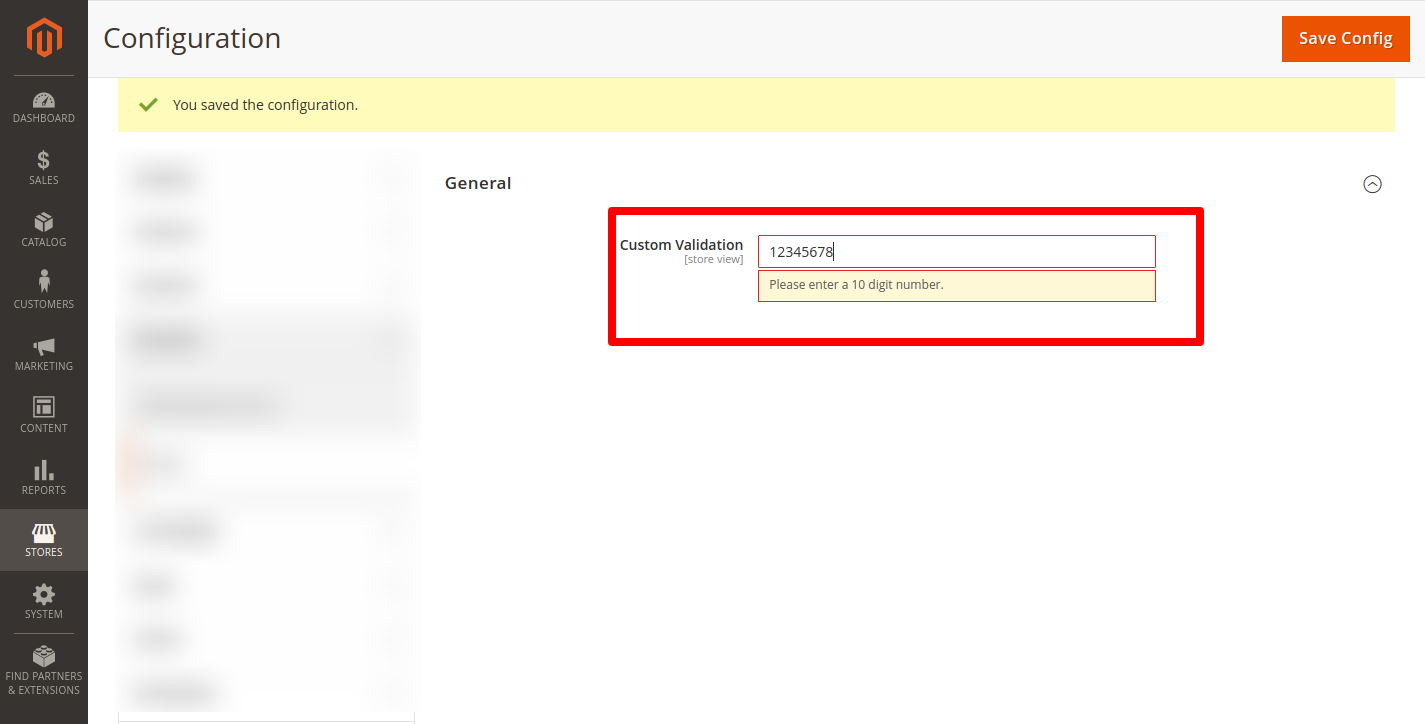
Result:-
After you implement the above code, check output in the admin panel of Magento 2. The Custom validation field will be displayed in the system configuration.
I Hope, This instruction will be helpful for you.
If you have any difficulties regarding this blog, do consider them posting in the Comments section below!
I’m here to help.
Thank you!

We can help you with
- Dedicated Team
- Setup Extended Team
- Product Development
- Custom App Development
Our Offices

AHMEDABAD (INDIA)
B- 203-206, Empire Business Hub, Science City Road, Sola, Ahmedabad – 380060

BERLIN (GERMANY)
Badensche Str. 28, 10715 Berlin, Germany

CALIFORNIA (USA)
9601 Reseda Blvd, Apt#223, Northridge CA-91324, USA

ALBERTA (CANADA)
302 Skyview Ranch Drive NE, Calgary, Alberta, Canada T3N0P5


Hello!
Click one of our contacts below to chat on WhatsApp