User Guide - Google One Step Login for Magento 2
General Configuration
General Configuration
Admin can configure the Google One Tap Login settings under the Stores > Configuration > Dolphin > Google One Tap Login.
General Settings

- Google Login: The admin can Enable/Disable extension for a specific store where this extension is not needed.
- Client Id: When admin add client id from Google API, then google one tap prompt will display in the frontend.
- Close Prompt on Background Click: The admin can Enable/Disable for automatically close prompt login when click on Background or out of prompt.
- Prompt Position: The admin can change the prompt login such as top left, top right, bottom left and bottom right.
Create Client Id

First of all, go to the Google Api link.
- Now, go to the Credentials from the left navigation panel as per the screenshot.
- Click on Create Credentials and you can see the multi-options. Now click on the OAuth client ID.
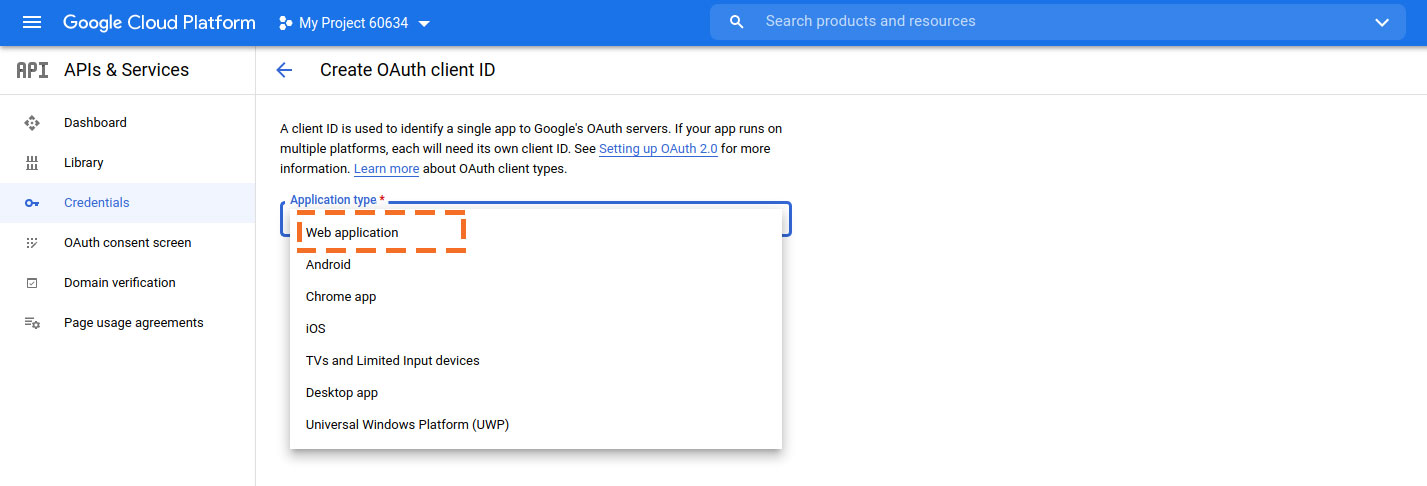
For Web Application

After clicking on OAuth Client ID, you need to choose Web application from the dropdown as per the above screenshot.
Add/Whitelist Store URL

Now, you need to add Name and store URL for authorized JavaScript origins and redirect URIs.
Note: If you need to use multiple stores, then you need to whitelist from here.
OAuth client created

The OAuth client id was created successfully, please copy and paste Client ID in System configuration and you can see Google One Tap Prompt on the frontend.
