---
title: "How to use slick carousel slider in Magento 2"
url: "https://dolphinwebsolution.com/how-to-use-slick-carousel-slider-in-magento-2"
date: "2022-05-27T13:13:07+05:30"
modified: "2023-08-31T04:57:52+05:30"
author:
name: "Prashant Dhaduk"
categories:
- "Blog"
- "Magento"
word_count: 955
reading_time: "5 min read"
summary: "In this article. we will explain how to use a slick carousel slider in Magento 2. Slick slider is a popular product list slider plugin. It can be added to your most popular product slider, new prod..."
description: "In this article. we will explain how to use a slick carousel slider in Magento 2. Slick slider is a popular product list slider plugin. It can be added to yo..."
keywords: "slick carousel slider,Magento 2,slick slider, Blog, Magento"
language: "en"
schema_type: "Article"
related_posts:
- title: "How to Add Dynamic Custom Tab in Product Page Magento 2"
url: "https://dolphinwebsolution.com/add-dynamic-custom-tab-in-product-page-magento-2"
- title: "Navigation menu not showing when Varnish Cache is activated"
url: "https://dolphinwebsolution.com/navigation-menu-not-showing-when-varnish-cache-is-activated"
- title: "How to Add Placeholder Text in Field for Checkout in Magento 2"
url: "https://dolphinwebsolution.com/how-to-add-placeholder-text-in-field-for-checkout-in-magento-2"
---
# How to use slick carousel slider in Magento 2
_Published: May 27, 2022_
_Author: Prashant Dhaduk_

In this article. we will explain how to use a slick carousel slider in Magento 2. Slick slider is a popular product list slider plugin. It can be added to your most popular product slider, new product slider, sale product slider, etc.
in Magento 2.4.3 and its upper version Magento by default provides a slick slider library so how can we use let’s talk about it.
Now, we will create a brand slider step-by-step.
If you have any difficulties regarding this blog, then you can [**hire our Magento 2 developers**](https://dolphinwebsolution.com/hire-magento-2-developers/).
**Method-1: Create brand slider programmatically**
**Step 1:** Create a static block or phtml file in your [custom theme](https://dolphinwebsolution.com/how-to-create-a-custom-theme-in-magento-2). Now Create a **slider.phtml** file at **app/design/frontend/Dolphin/slider/Magento\_Theme/templates/** And insert the following code in your template file in your custom theme.
```
 ```
**Step 2:** Now Create a **cms\_index\_index.xml** at **app/design/frontend/Dolphin/slider/Magento\_Theme/layout/** and insert the below code for configure the **slider.phtml** file. This slider calls into the home page. If you want to put the slider into other pages or layout files then put the below code into your layout file.
```
```
**Step 3:** Then, you create **custom.js** at **app/design/frontend/Dolphin/slider/web/js/** and insert the slick js code in the file.
```
require(['jquery', 'jquery/ui', 'slick'], function($){
$(document).ready(function() {
$('.slick-slider').slick({
dots: true,
infinite: false,
slidesToShow: 4,
slidesToScroll: 4,
autoplay: true
});
});
});
```
After you implement the above code, check the output to the brand slick slider shown on the home page.

**Method-2: Slider using Pagebuilder**
Also, you can create a banner slider for using page builder functionality in Magento 2.4.3 and above version
Expand the Content section on the CMS page, block, or dynamic block where you want to place the slider. Expand Media and drag a Slider placeholder to a row, column, or tab on the stage in the Page Builder panel.
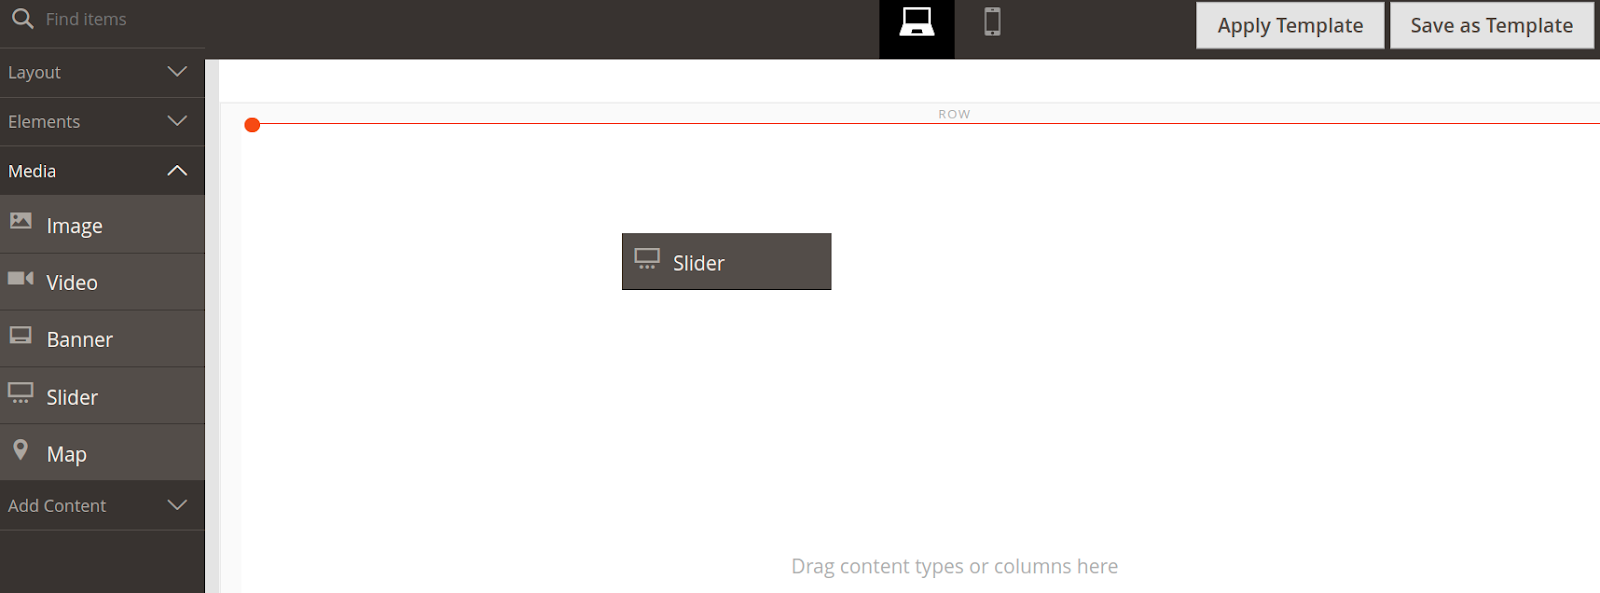
Drag the slider to the desired stage with a single, empty slide, the slider container is displayed on the stage.
Then to start a new slide, click the navigation dot, then select Settings Icon from the toolbox. And upload a background image or color into the background tab you can also modify the below sections as per your requirements.
- Appearance- Background- Content- Advanced
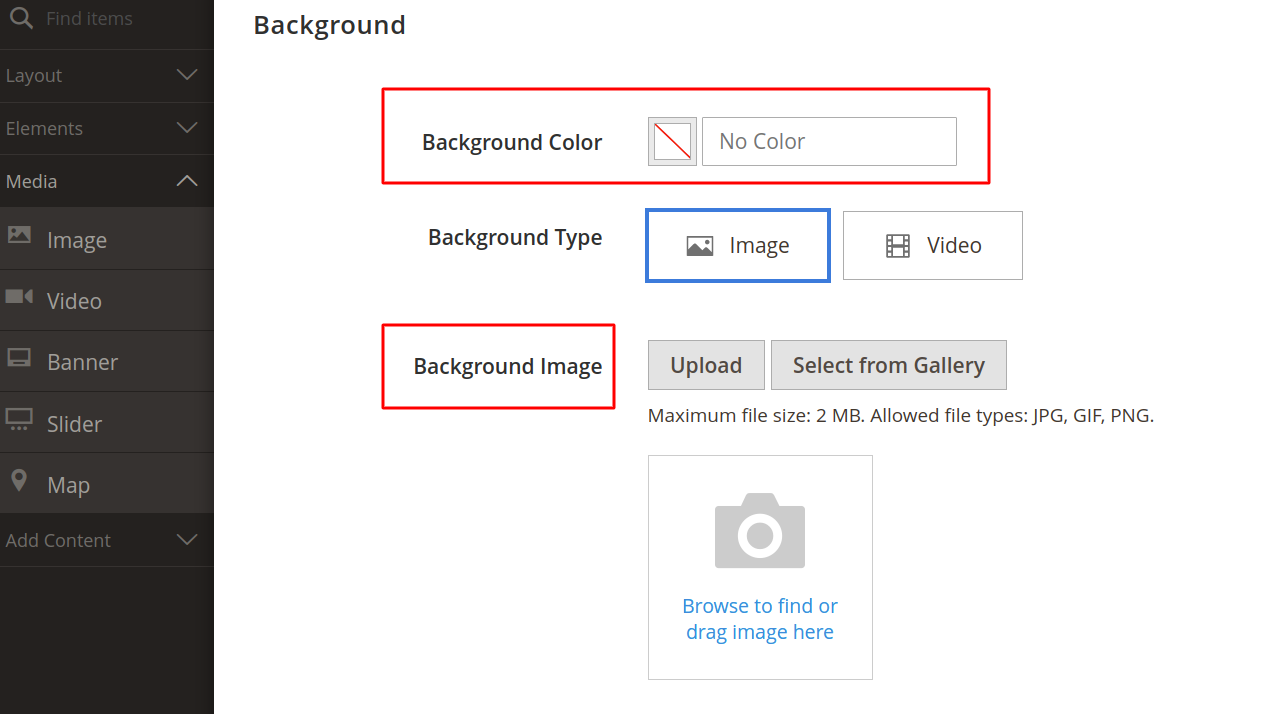
When finished, close the Edit Slide page by clicking Save in the upper-right corner.
#### Add More Slides
**Method 1:** Duplicate the current slide.
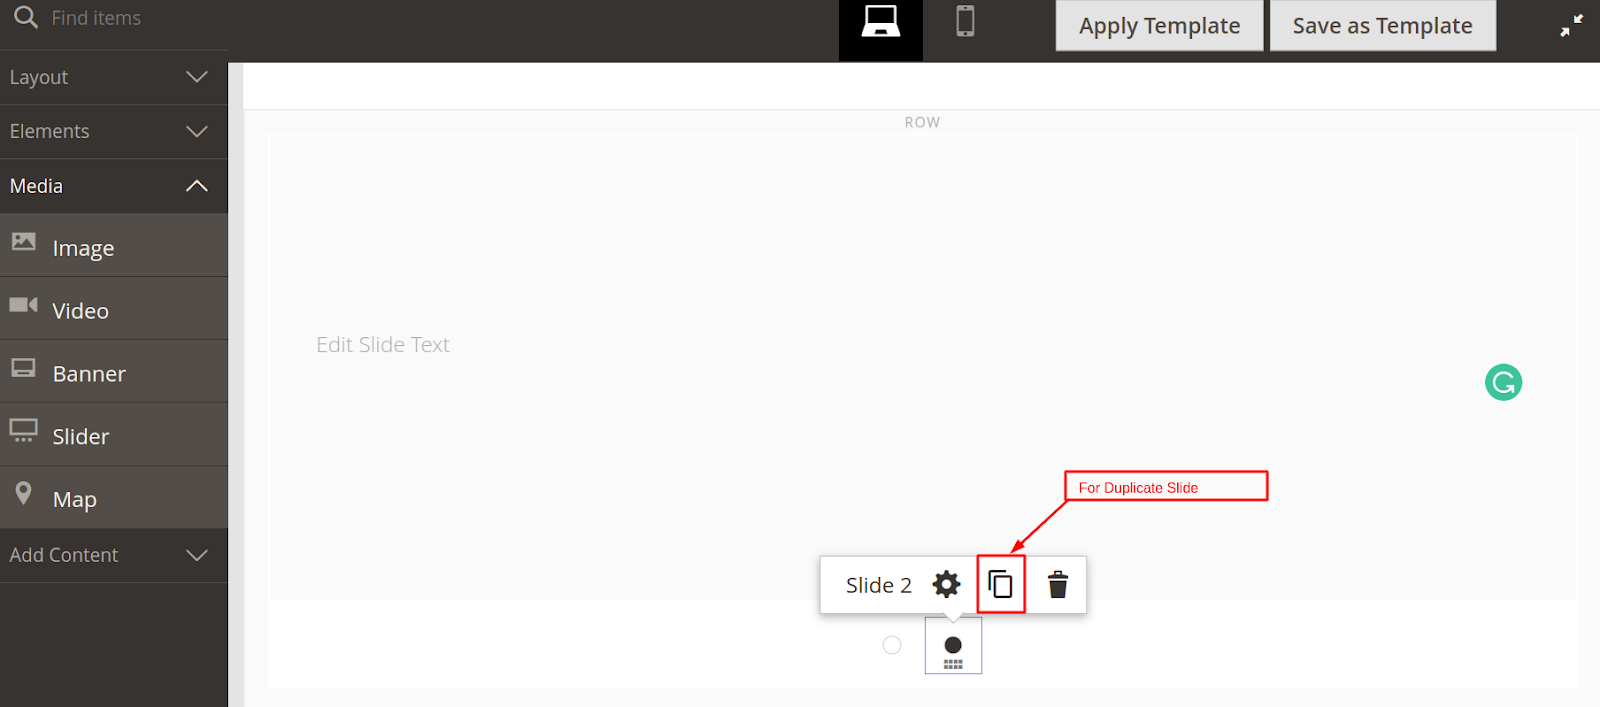
You can duplicate a previously configured slide with the necessary settings. To display the toolbox, click the navigation dot below the slide and select the Duplicate icon.
When finished, close the Edit Slide page by clicking Save in the upper-right corner.
**Method 2:** Add a New Blank Slide
Hover over the slider container at the top to bring up the toolbox, then click the Add icon.
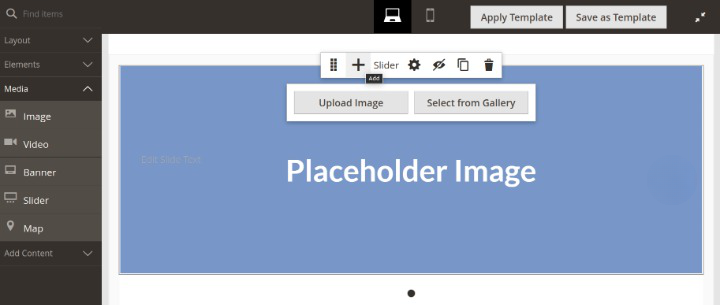
Adding a blank slide
When you click on add icon display a new blank slide displays with its navigation dots.
New empty slide with the toolbox
Click new slide dots to choose the setting icon and configure it to add the background images and modify its other property. Same as adding three or more slides to show the proper banner slider.
after that, you can configure the slider setting for the banner slider Hover to the slider container at the top to click the setting icon the customize the slider elements like arrows, dots, autoplay, etc.
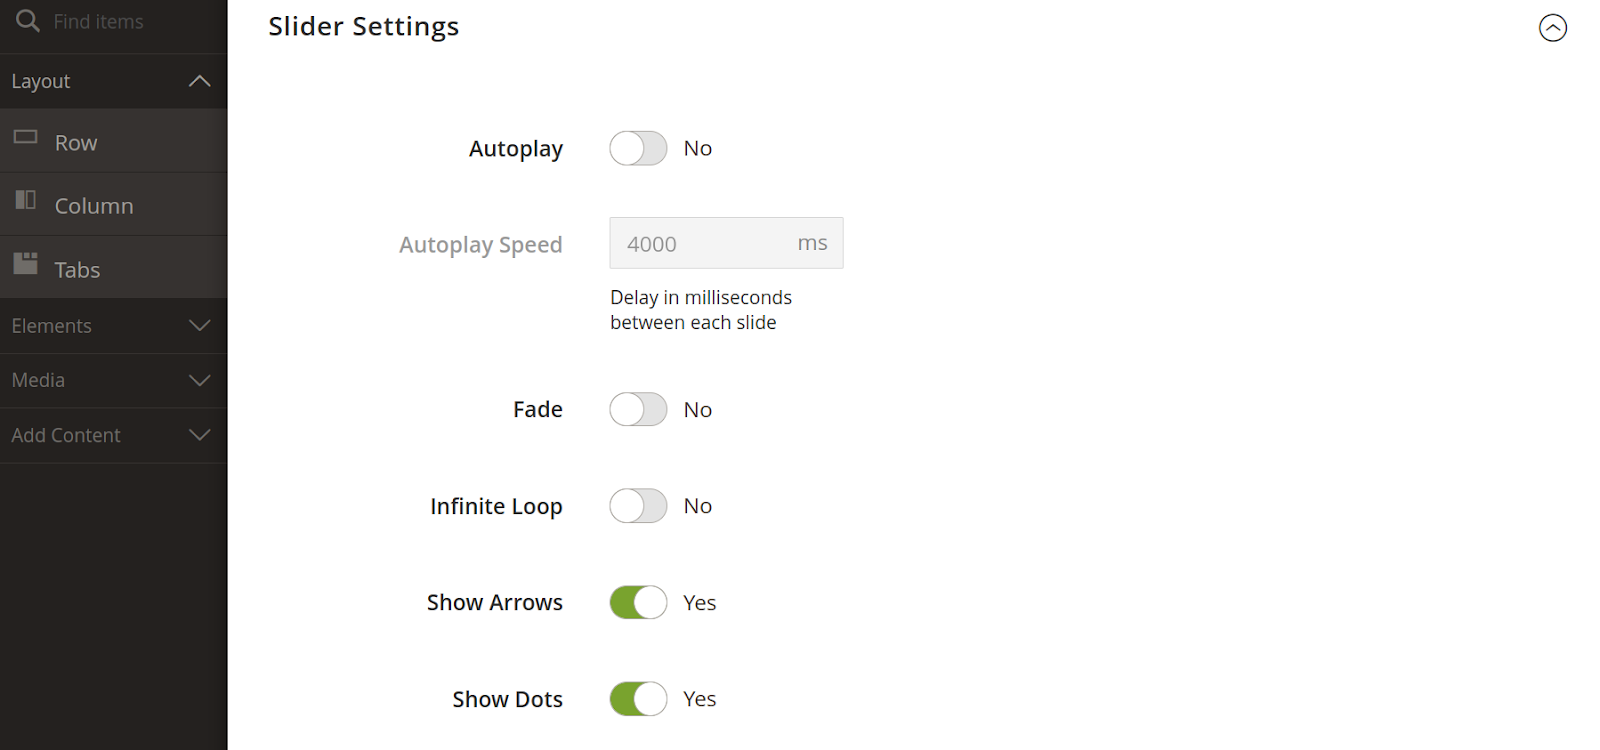
Now, close the Edit Slide page by clicking Save in the upper-right corner. And show output on the front side of the page.
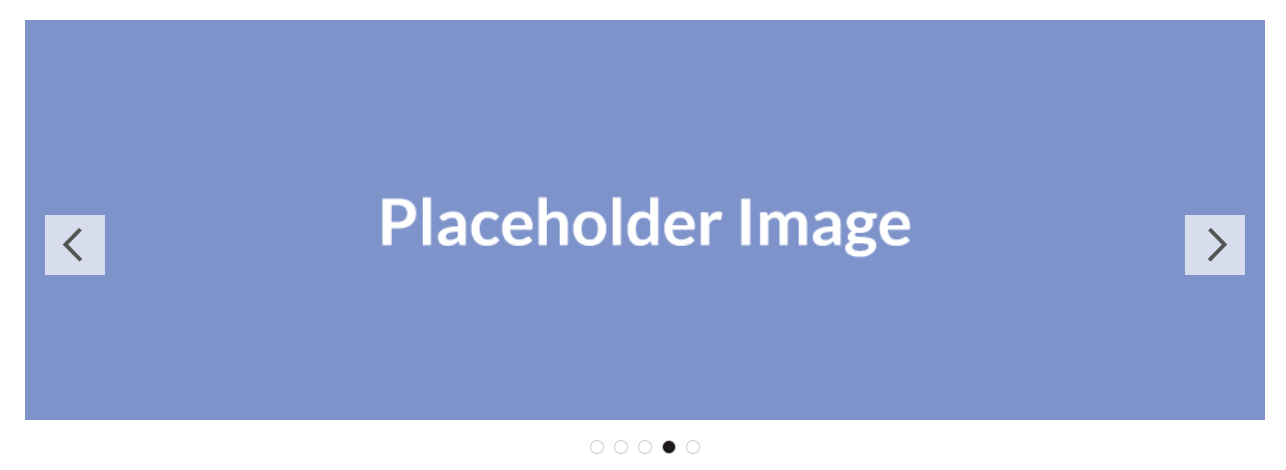
**Result:**
After you implement the above code, check the output to the banner slider shown on the home page.
**That’s it!**
I hope this technical blog will help you to find what you were looking for.
If you have any further questions about Magento 2 theme development or if need any help from our Magento 2 expert, contact us now for a free consultation.
**Bookmark** it for your future reference. Do comment below if you have any other questions.
**P.S.** Do share this note with your team.
```
**Step 2:** Now Create a **cms\_index\_index.xml** at **app/design/frontend/Dolphin/slider/Magento\_Theme/layout/** and insert the below code for configure the **slider.phtml** file. This slider calls into the home page. If you want to put the slider into other pages or layout files then put the below code into your layout file.
```
```
**Step 3:** Then, you create **custom.js** at **app/design/frontend/Dolphin/slider/web/js/** and insert the slick js code in the file.
```
require(['jquery', 'jquery/ui', 'slick'], function($){
$(document).ready(function() {
$('.slick-slider').slick({
dots: true,
infinite: false,
slidesToShow: 4,
slidesToScroll: 4,
autoplay: true
});
});
});
```
After you implement the above code, check the output to the brand slick slider shown on the home page.

**Method-2: Slider using Pagebuilder**
Also, you can create a banner slider for using page builder functionality in Magento 2.4.3 and above version
Expand the Content section on the CMS page, block, or dynamic block where you want to place the slider. Expand Media and drag a Slider placeholder to a row, column, or tab on the stage in the Page Builder panel.

Drag the slider to the desired stage with a single, empty slide, the slider container is displayed on the stage.
Then to start a new slide, click the navigation dot, then select Settings Icon from the toolbox. And upload a background image or color into the background tab you can also modify the below sections as per your requirements.
- Appearance- Background- Content- Advanced

When finished, close the Edit Slide page by clicking Save in the upper-right corner.
#### Add More Slides
**Method 1:** Duplicate the current slide.
You can duplicate a previously configured slide with the necessary settings. To display the toolbox, click the navigation dot below the slide and select the Duplicate icon.
When finished, close the Edit Slide page by clicking Save in the upper-right corner.
**Method 2:** Add a New Blank Slide
Hover over the slider container at the top to bring up the toolbox, then click the Add icon.

Adding a blank slide
When you click on add icon display a new blank slide displays with its navigation dots.

New empty slide with the toolbox
Click new slide dots to choose the setting icon and configure it to add the background images and modify its other property. Same as adding three or more slides to show the proper banner slider.
after that, you can configure the slider setting for the banner slider Hover to the slider container at the top to click the setting icon the customize the slider elements like arrows, dots, autoplay, etc.

Now, close the Edit Slide page by clicking Save in the upper-right corner. And show output on the front side of the page.
**Result:**
After you implement the above code, check the output to the banner slider shown on the home page.

**That’s it!**
I hope this technical blog will help you to find what you were looking for.
If you have any further questions about Magento 2 theme development or if need any help from our Magento 2 expert, contact us now for a free consultation.
**Bookmark** it for your future reference. Do comment below if you have any other questions.
**P.S.** Do share this note with your team.