---
title: "How to Create Module in Magento 2"
url: "https://dolphinwebsolution.com/how-to-create-module-in-magento-2"
date: "2020-10-10T10:26:41+05:30"
modified: "2023-08-28T06:07:47+05:30"
author:
name: "Payal Patel"
categories:
- "Magento"
tags:
- "Magento 2.x"
- "Magento developers"
word_count: 856
reading_time: "5 min read"
summary: "The module is a structural element of Magento 2. It’s a logical group – that is, a directory containing blocks, controllers, helpers, modules that are related to the specific business features...."
description: "In this blog, you can see How to Create Module in Magento 2. The module is a structural element of Magento 2. It’s a logical group – that is, a directory..."
keywords: "Create Module in Magento 2,Magento 2 Create Basic Module,Magento 2 Create Module,Create Basic Module for Magento 2,How to Create Module in Magento 2, Magento 2.x, Magento developers"
language: "en"
schema_type: "Article"
related_posts:
- title: "Magento 2 Add Pagination in Custom Collection"
url: "https://dolphinwebsolution.com/magento-2-add-pagination-in-custom-collection-of"
- title: "Magento 2 SMTP for Gmail not working"
url: "https://dolphinwebsolution.com/magento-2-smtp-for-gmail-not-working"
- title: "How Magento 2 identify module"
url: "https://dolphinwebsolution.com/how-magento-2-identify-module"
---
# How to Create Module in Magento 2
_Published: October 10, 2020_
_Author: Payal Patel_

> The module is a structural element of Magento 2. It’s a logical group – that is, a directory containing blocks, controllers, helpers, modules that are related to the specific business features. The purpose of a module is to provide specific product features by implementing new functionality or extending the functionality of other modules. Each module is designed to function independently, so the inclusion or exclusion of a particular module does not typically affect the functionality of other modules.
Let’s discuss how to Create Module in Magento 2 in simple words. The module is a structural element of Magento 2. It’s a logical group – that is a directory containing blocks, controllers, helpers, modules that are related to the specific business features. The purpose of a module is to provide specific product features by implementing new functionality or extending the functionality of other modules. Each module is designed to function independently, so the inclusion or exclusion of a particular module does not typically affect the functionality of other modules.
Before creating the module put Magento into **developer mode**.
If you put in developer mode, you can see all errors Magento is throwing at you.
Now, open your terminal and go to the Magento 2 root and run the following command:
```
php bin/magento deploy:mode:set developer
```
We are going to follow steps for Module Development.
### **Step 1:** Create a folders
- app/code/Dolphin
- app/code/Dolphin/MyModule
If you don’t have the **code** folder in your **app** directory, create it manually.
Now, we have the module folder, we need to register the module.
For more module development [hire our dedicated app developer](https://dolphinwebsolution.com/hire-android-developers/)
### Step 2: Create Registration
Create **registration.php** file in the **app/code/Dolphin/MyModule** folder with the following code.
```
```
### Step 4: Follow step
Open your terminal and go to the Magento 2 root and run the following command:
```
php bin/magento setup:upgrade
```
Now, go to **app/etc** folder open **config.php** file and check **Dolphin\_MyModule** with value should be set to **1**.
### **Step 5:** Creating the controller
First, we need to create **routes.xml** file in the **app/code/Dolphin/MyModule/etc/frontend** with the following code.
```
```
Here frontend router and route with an id **mymodule**.
Here is **frontName** attribute as part of our URL.
**In Magento 2 URL’s is:**
```
//
```
Now, we need to create the controller. You have to create separate files for each. Create **Index.php** file in the **app/code/Dolphin/MyModule/Controller/Index** with the following code.
```
_resultPageFactory = $resultPageFactory;
parent::__construct($context);
}
public function execute()
{
$resultPage = $this->_resultPageFactory->create();
return $resultPage;
}
}
```
### **Step 6:** Create a block
The block contains PHP view classes. We will create a block class with **MyModule.php** file in the **app/code/Dolphin/MyModule/Block** with the following code.
```
Magento 2 Module
```
### Step 8: Create a template file
Create a template file that will be used to call block function. Create [**mymodule.phtml**](https://magento.stackexchange.com/questions/128692/magento-2-custom-phtml-file-add-in-product-page) file in the **app/code/Dolphin/MyModule/view/frontend/templates** with the following code.
```
getMymodule(); ?>
```
### Step 9: Run Magento
```
Run Magento Upgrade and Cache Clean command.
php bin/magento setup:upgrade
php bin/magento cache:clean
```
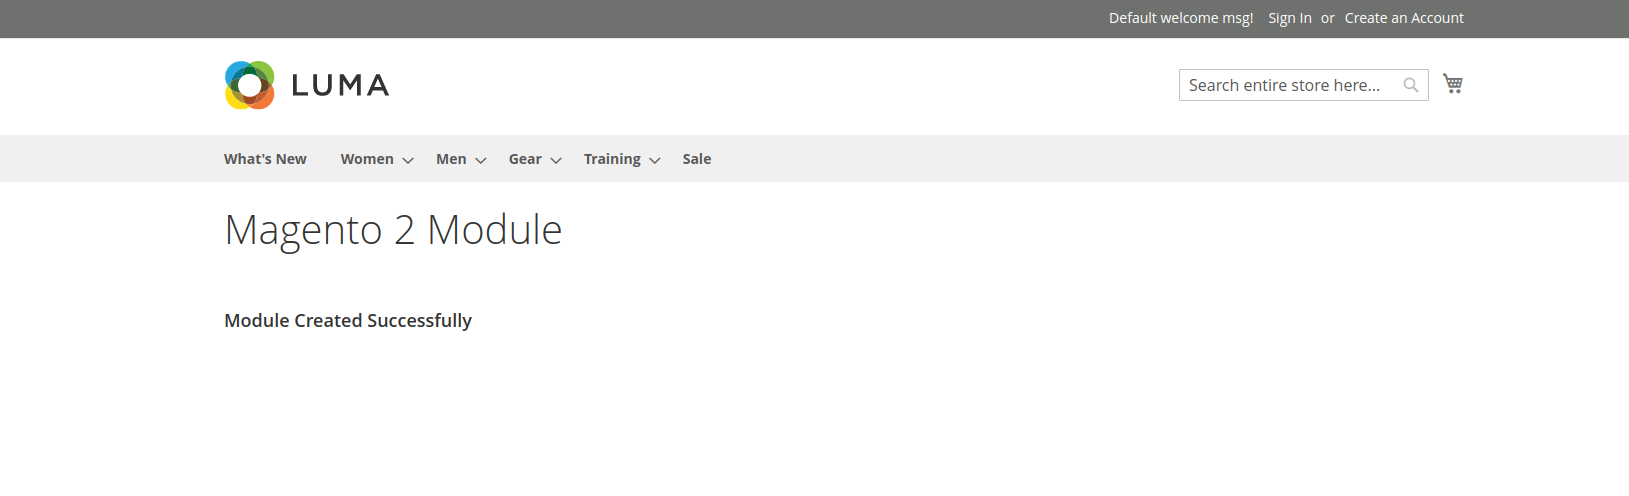
Now, open the URL **yourdomain/mymodule/index/index** in your browser and you should get something like this:
[](https://dolphinwebsolution.com/wp-content/uploads/2020/10/basic_module_mage2-3.png)
We hope our technical blog which looking is very effective for you. If any questions, please feel free to leave a comment below.
In the next tutorial, you will help [How to create blocks, Layouts and Templates in Magento 2](https://dolphinwebsolution.com/how-to-create-block-layouts-and-templates-magento-2).
---
_View the original post at: [https://dolphinwebsolution.com/how-to-create-module-in-magento-2](https://dolphinwebsolution.com/how-to-create-module-in-magento-2)_
_Served as markdown by [Third Audience](https://github.com/third-audience) v3.5.3_
_Generated: 2026-08-26 06:14:03 UTC_