---
title: "How to create Category Page Layout in Magento."
url: "https://dolphinwebsolution.com/how-to-create-category-page-layout-in-magento"
date: "2022-05-23T11:07:37+05:30"
modified: "2023-08-24T09:19:34+05:30"
author:
name: "Jayesh Makwana"
categories:
- "Blog"
- "Magento"
word_count: 989
reading_time: "5 min read"
summary: "In this article. we will create a new category page layout and use that layout using the custom category attributes in Magento.
To begin with, why would you need to add a custom layout to a cate..."
description: "In this article. we will create a new category page layout and use that layout using the custom category attributes in Magento. To begin with, why would you ..."
keywords: "category page layout,page layout,category attributes, Blog, Magento"
language: "en"
schema_type: "Article"
related_posts:
- title: "How To Get Administrators Role’s User Ids programmatically in Magento 2"
url: "https://dolphinwebsolution.com/how-to-get-administrators-roles-user-ids-programmatically-in-magento-2"
- title: "How to add Custom Information in Invoice PDF in Magento2?"
url: "https://dolphinwebsolution.com/how-to-add-custom-information-in-invoice-pdf-in-magento2"
- title: "Add Custom Validation To System Configuration Field In Magento 2"
url: "https://dolphinwebsolution.com/add-custom-validation-to-system-configuration-field-in-magento-2"
---
# How to create Category Page Layout in Magento.
_Published: May 23, 2022_
_Author: Jayesh Makwana_

In this article. we will create a new category page layout and use that layout using the custom category attributes in Magento.
To begin with, why would you need to add a custom layout to a category? You may need to accomplish one of the following:
1. customize some CSS for that specific type of page2. insert more page information (like blocks and containers via layout)3. Add some custom JS to the page, such as tracking scripts and tracking pixels.
We’ll utilize events and observers to add a custom layout to the category page — it’s only one technique to extend Magento 2 capability. and we’ll use the layout\_load\_before because there is no other point (for categories) to append a custom layout until the page is rendered.
**Please follow the below steps to know how to update the category page layout for a specific category using a custom attribute in Magento 2.**
**Step 1**: This article assumes the reader is familiar with Magento 2 modules and how they work. If not, it is highly recommended to [read the documentation first](https://dolphinwebsolution.com/how-to-create-module-in-magento-2). All files mentioned below must be placed inside a module.
**Step 2**: Create **InstallData.php** at **app/code/Dolphin/CustomModule/Setup/**
Inside the file, we create the custom category attribute code as shown below:
```
eavSetupFactory = $eavSetupFactory;
}
public function install(ModuleDataSetupInterface $setup, ModuleContextInterface $context) {
$eavSetup = $this->eavSetupFactory->create(['setup' => $setup]);
$eavSetup->addAttribute(\Magento\Catalog\Model\Category::ENTITY, 'custom_layout', [
'type' => 'int',
'label' => 'Custom Layout',
'input' => 'boolean',
'source' => 'Magento\Eav\Model\Entity\Attribute\Source\Boolean',
'visible' => true,
'default' => '0',
'required' => false,
'global' => \Magento\Eav\Model\Entity\Attribute\ScopedAttributeInterface::SCOPE_STORE,
'group' => 'Display Settings',
]);
}
}
```
**Step 3**: Create **category\_form.xml** at **app/code/Dolphin/CustomModule/view/adminhtml/ui\_component/**
Inside the file, we display the Custom Category attribute on the Display Settings tab in the Admin Side Category View page as shown below:
```
```
Now, this is complete to use as a custom layout. You can check this layout in the admin panel configuration setting.
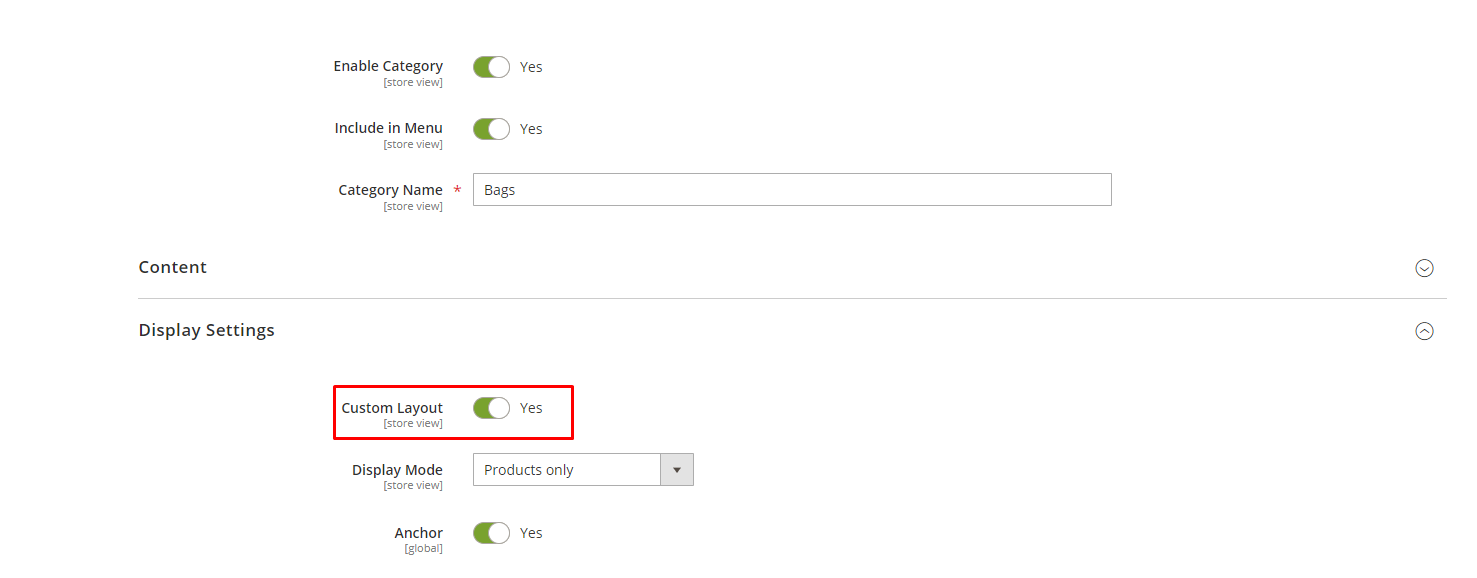
**Step 4**: Create **events.xml** at **app/code/Dolphin/CustomModule/etc/frontend/**
Inside the file, we use the layout\_load\_before code as shown below:
```
```
**Step 5**: Create **Categorycustomlayout.php** at **app/code/Dolphin/CustomModule/Observer/**
Inside the file, we check the category attribute is enabled/disabled and add the layout handle for page layout code as shown below:
```
registry = $registry;
}
public function execute(Observer $observer) {
if ($observer->getFullActionName() !== self::ACTION_NAME) {
return;
}
$category = $this->registry->registry('current_category');
/** @var \Magento\Framework\View\Layout $layout */
if ($category->getCustomLayout()) {
$layout = $observer->getLayout();
$layout->getUpdate()->addHandle('catalog_category_custom_view');
} else {
return true;
}
}
}
```
**Step 6**: Create **catalog\_category\_custom\_view.xml** at **app/code/Dolphin/CustomModule/view/frontend/layout/**
Inside the file, we remove the sidebar wishlist and custom class code as shown below:
```
```
**Conclusion**
As you can look from these simple examples, it’s easy to customize the page using a custom layout. Apply some CSS for styling and you’ll have your new page layout with new customized content a couple of times.
**You may also like to read**
1. [Create a custom layout](https://dolphinwebsolution.com/how-to-create-a-custom-layout-for-cms-pages-in-magento)
2. [Customize Product Page Layout](https://dolphinwebsolution.com/how-to-customize-product-page-layout-in-magento-2)
**That’s it!**
I hope this technical blog will help you to find what you were looking for.
That’s all, If you have any further questions about Magento 2 theme development or if need any help from our [Magento 2 expert](https://dolphinwebsolution.com/hire-magento-2-developers/), contact us now for a free consultation.
**Bookmark** it for your future reference. Do comment below if you have any other questions.
**P.S.** Do share this note with your team.
---
_View the original post at: [https://dolphinwebsolution.com/how-to-create-category-page-layout-in-magento](https://dolphinwebsolution.com/how-to-create-category-page-layout-in-magento)_
_Served as markdown by [Third Audience](https://github.com/third-audience) v3.5.3_
_Generated: 2026-08-26 06:14:13 UTC_