How to Create Admin Theme in Magento 2

In this article. we will explain how to create admin theme and how to apply the admin theme in Magento 2. Let’s find out how you can do it.
- To begin, switch the Magento 2 application to developer mode, If you put it in developer mode, you can see all errors Magento is throwing at you. Now, open your terminal and go to the Magento 2 root and run the following command:
php bin/magento deploy:mode:set developer
Create Admin Theme
Now, we will start to learn step-by-step.
Step 1: First create a <VendorName>/<theme name> folder at the app/design/adminhtml path for the new Magento admin theme.
- We’ll show you an example of a Dolphin/backend theme for the following path: app/design/adminhtml/Dolphin/backend/
Step 2: In order to define Magento themes, in the theme root folder.
- Create a theme.xml file at app/design/adminhtml/Dolphin/backend/ and paste the below code :
<?xml version="1.0"?>
<!--
/**
 * Created By: Dolphin Web Solution Pvt. Ltd.
 */
-->
<theme xmlns:xsi="http://www.w3.org/2001/XMLSchema-instance" xsi:noNamespaceSchemaLocation="urn:magento:framework:Config/etc/theme.xsd">
    <title>Dolphin Admin Theme</title>
    <parent>Magento/backend</parent>
</theme>
Step 3: In order to register a theme in the system, in the theme folder.
- Create a registration.php file at app/design/adminhtml/Dolphin/backend/ and paste the below code :
<?php
/**
 * Created By: Dolphin Web Solution Pvt. Ltd.
 */
\Magento\Framework\Component\ComponentRegistrar::register(
    \Magento\Framework\Component\ComponentRegistrar::THEME,
    'adminhtml/Dolphin/backend',
    __DIR__
);
Step 4: Now We changed the logo on the admin login page and in the dashboard. So put your images in the app/design/adminhtml/Dolphin/backend/web/images folder to save the media file.
Create a Module to apply an admin theme
We are going to follow the steps for Module Development.
Step 1: The theme has already been created, but it is still unconnected. We create a specialised <VendorName>/<ModuleName> module in the app/code/ folder to connect the admin theme.
- We’ll show you an example of a Dolphin/Backend module for the following path: app/code/Dolphin/Backend
Step 2: create a registration.php file.
- Create a registration.php file in the app/code/Dolphin/Backend folder with the following code:
<?php
/**
 * Created By: Dolphin Web Solution Pvt. Ltd.
 */
    \Magento\Framework\Component\ComponentRegistrar::register(
    \Magento\Framework\Component\ComponentRegistrar::MODULE,
    'Dolphin_Backend',
    __DIR__
);
Step 3: create a module.xml and di.xml file.
- Create a module.xml and di.xml file in the app/code/Dolphin/Backend/etc folder.
Add below code for the app/code/Dolphin/Backend/etc/module.xml file.
<?xml version="1.0"?>
<!--
/**
 * Created By: Dolphin Web Solution Pvt. Ltd.
 */
-->
<config xmlns:xsi="http://www.w3.org/2001/XMLSchema-instance" xsi:noNamespaceSchemaLocation="urn:magento:framework:Module/etc/module.xsd">
    <module name="Dolphin_Backend" setup_version="0.0.1">
        <sequence>
            <module name="Magento_Theme"/>
        </sequence>
    </module>
</config>
Similarly, add the below code for the app/code/Dolphin/Backend/etc/di.xml file.
<?xml version="1.0"?>
<!--
/**
 * Created By: Dolphin Web Solution Pvt. Ltd.
 */
-->
<config xmlns:xsi="http://www.w3.org/2001/XMLSchema-instance" xsi:noNamespaceSchemaLocation="urn:magento:framework:ObjectManager/etc/config.xsd">
    <type name="Magento\Theme\Model\View\Design">
        <arguments>
            <argument name="themes" xsi:type="array">
                <item name="adminhtml" xsi:type="string">Dolphin/Backend</item>
            </argument>
        </arguments>
    </type>
</config>
Step 4: Create layout files for the admin login page and admin home page in Magento 2.
- Create a admin_login.xml file in the app/code/Dolphin/Backend/view/adminhtml/layout/ folder with the following code:
<?xml version="1.0"?>
<!--
/**
 * Created By: Dolphin Web Solution Pvt. Ltd.
 */
-->
<page xmlns:xsi="http://www.w3.org/2001/XMLSchema-instance" layout="admin-login" xsi:noNamespaceSchemaLocation="urn:magento:framework:View/Layout/etc/page_configuration.xsd">
    <update handle="styles" />
    <body>
        <referenceBlock name="logo">
            <arguments>
                <argument name="logo_image_src" xsi:type="string">images/dws_logo.jpg</argument>
            </arguments>
        </referenceBlock>
    </body>
</page>
- Create a default.xml file in the app/code/Dolphin/Backend/view/adminhtml/layout/ folder with the following code:
<?xml version="1.0"?>
<!--
/**
 * Created By: Dolphin Web Solution Pvt. Ltd.
 */
-->
<page xmlns:xsi="http://www.w3.org/2001/XMLSchema-instance" layout="admin-1column" xsi:noNamespaceSchemaLocation="urn:magento:framework:View/Layout/etc/page_configuration.xsd">
    <body>
        <referenceContainer name="header">
            <block class="Magento\Backend\Block\Page\Header" name="logo" before="-">
                <arguments>
                    <argument name="show_part" xsi:type="string">logo</argument>
                    <argument name="logo_image_src" xsi:type="string">images/dws_admin.png</argument>
                </arguments>
            </block>
        </referenceContainer>
    </body>
</page>
Step 5: Now run the following command:
php bin/magento setup:upgrade
php bin/magento setup:static-content:deploy –f
php bin/magento cache:clean
Result:
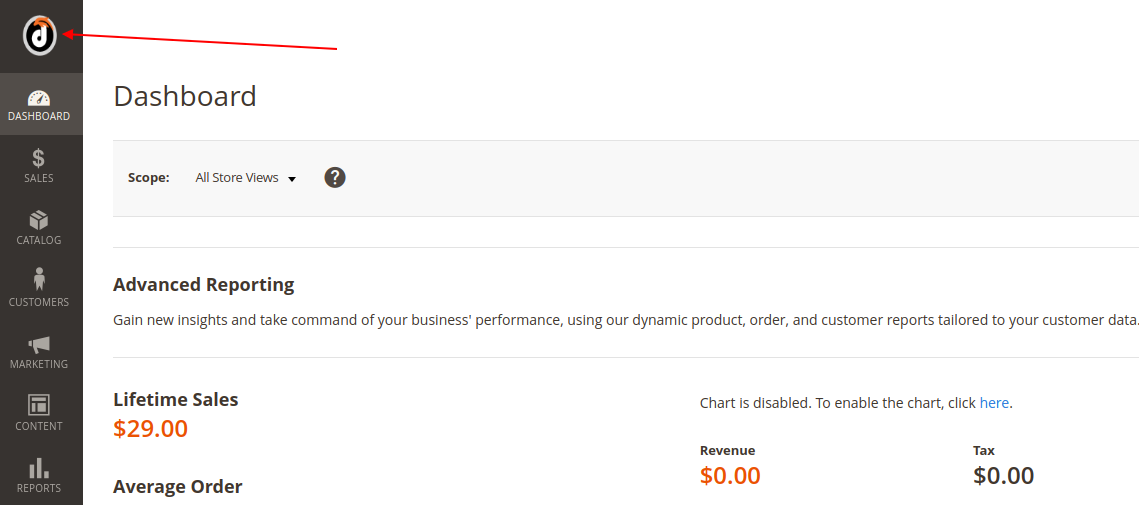
After the run upgrade and deploy command, you can see the logo to be changed on the Admin Login Page and Admin Panel Home page.


That’s it!
I hope this technical blog will help you to find what you were looking for.
If you have any further questions about Magento 2 theme development or if need any help from our Magento 2 expert, contact us now for a free consultation.
Bookmark it for your future reference. Do comment below if you have any other questions.
P.S. Do share this note with your team.
