How To Add Or Create Slide-out(Sliding) ,Modal Windows Panels in Magento 2

Magento application it is often necessary to focus the user’s attention on some particular bit of content or isolated action, process or sub-process. A “Slide-out Panel”, “Modal Window” or “Overlay” is an effective way to achieve this. These are triggered by a particular user action causing their current task to be interrupted.
Use of Slide-out Panels (aka “Slideouts”)
Slide-out panels should be used for tertiary actions or sub-processes related to the user’s primary path. These panels allow for greater content and/or more complex interactions thus behaving much like an additional webpage while maintaining a contextual connection to the primary task.
Anatomy of Slideout
The active panel should include the following elements:
- Content container (Panel)
- A Page title
- Close control “×” (ESC-key via keyboard)
- Button bar for actions, including a “Cancel” (ESC-key is Cancel via keyboard)
- Page Content
- “Shade” to disable lower-level page
Like to Read: How To Add HTML note in UI component form field.
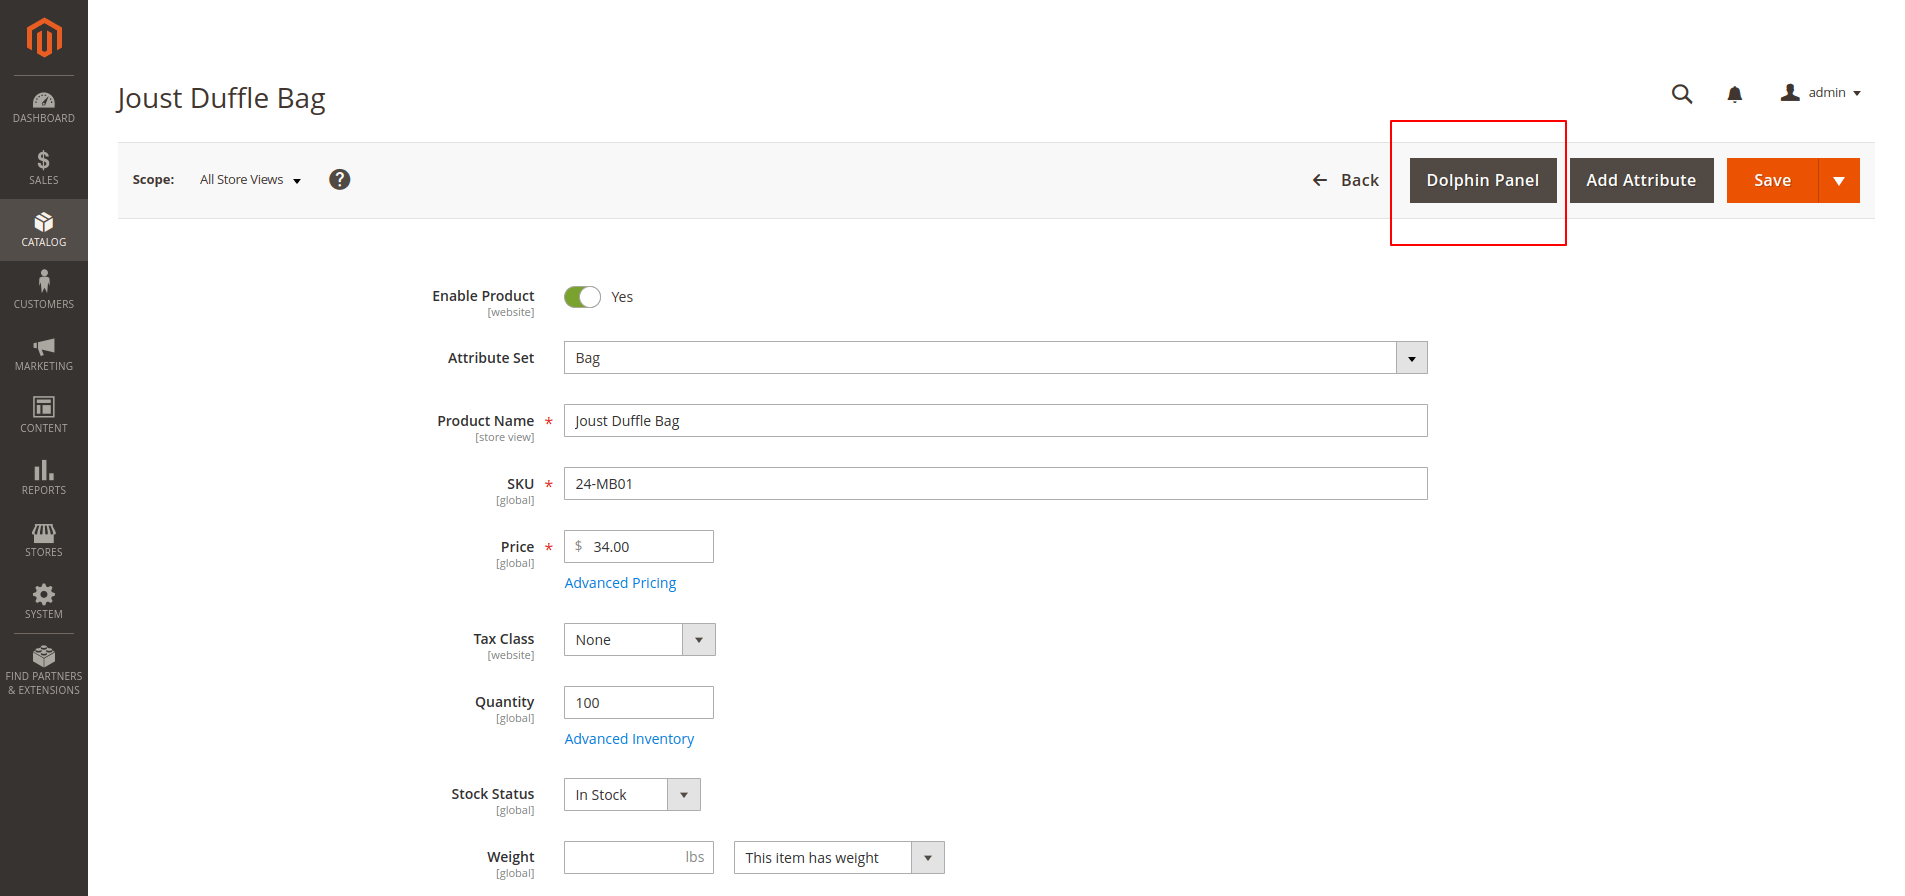
Create a custom button on the product add/edit page and on the button click, open a popup with some fields/contents. Add a custom button (SlidePanel) to the product edit page.
Steps to Add Or Create Slide-out(Sliding) Panels in Magento 2
We are already learned how to create a basic module in Magento 2. We need to create module.xml and registration.php files. You can create module.xml and registration.php from this tutorial.
Here we use Dolphin as the Vendor name and Sliding as the module’s name. You can change this according to your Vendor and Module name.
Step 1: Create a Ui-Component File
Now we create a UI-component file product_form.xml in app/code/Dolphin/Sliding/view/adminhtml/ui_component folder with the following code.
<?xml version="1.0" encoding="UTF-8"?>
<form xmlns:xsi="http://www.w3.org/2001/XMLSchema-instance" xsi:noNamespaceSchemaLocation="urn:magento:module:Magento_Ui:etc/ui_configuration.xsd">
<settings>
<buttons>
<button name="openModel" class="Dolphin\Sliding\Block\Adminhtml\Product\Edit\AddModelButton"/>
</buttons>
</settings>
<modal name="test_model">
<settings>
<options>
<option name="buttons" xsi:type="array">
<item name="0" xsi:type="array">
<item name="text" xsi:type="string">Done</item>
<item name="class" xsi:type="string">action-primary</item>
<item name="actions" xsi:type="array">
<item name="0" xsi:type="array">
<item name="targetName" xsi:type="string">${ $.name }</item>
<item name="actionName" xsi:type="string">actionDone</item>
</item>
</item>
</item>
</option>
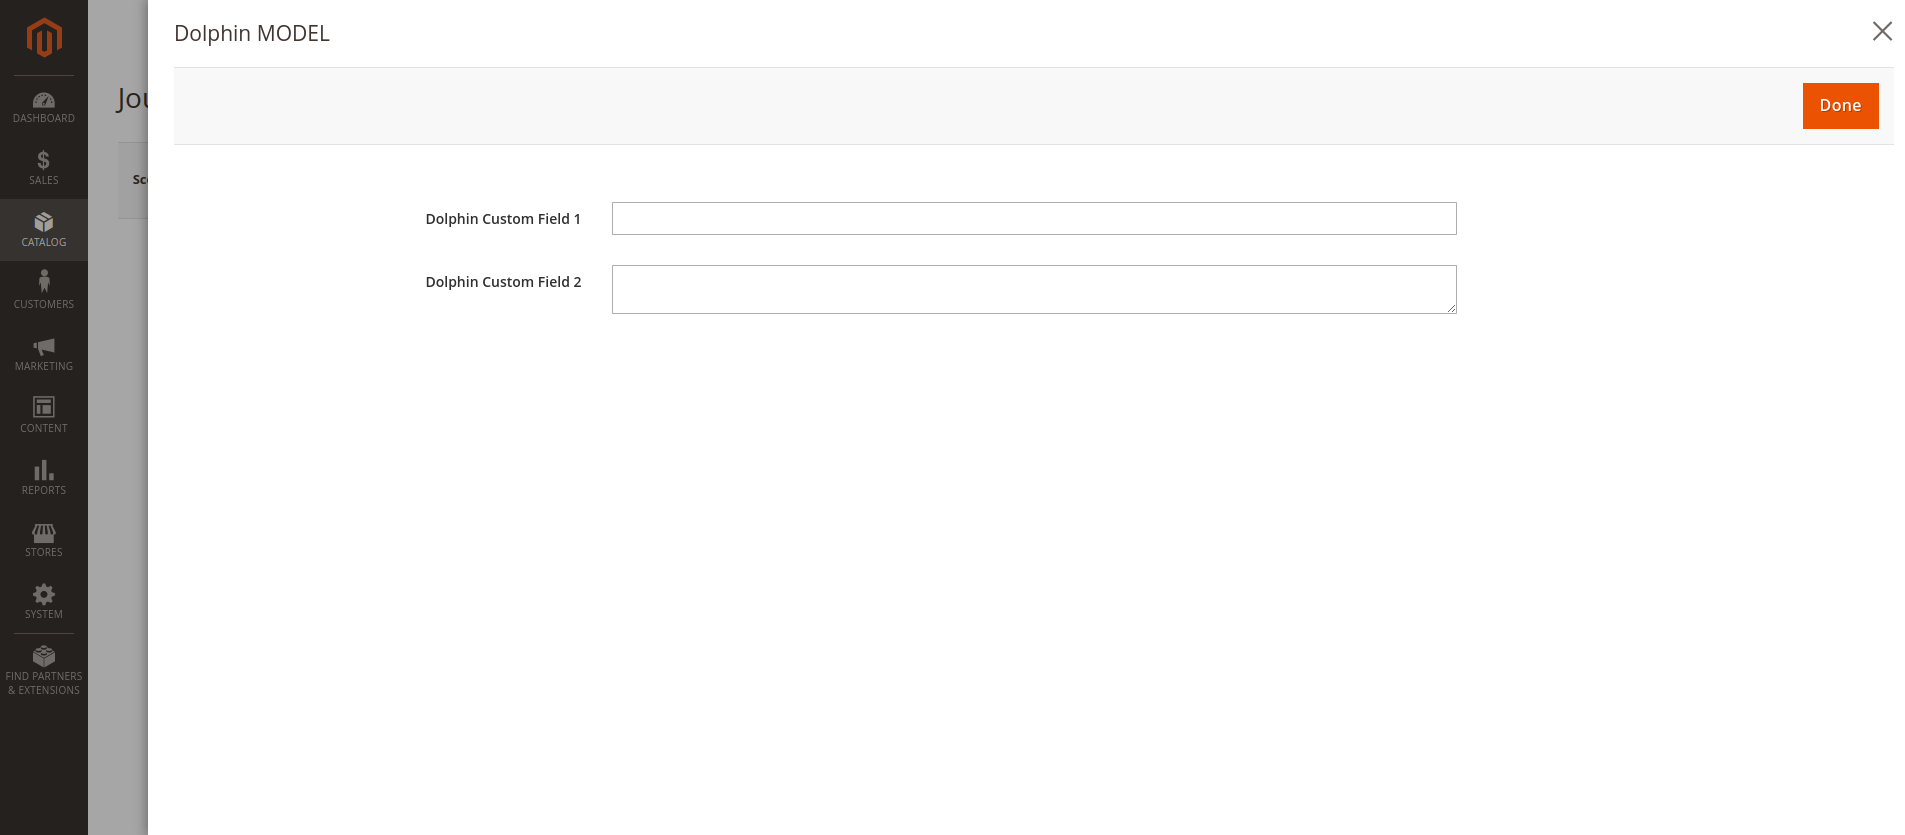
<option name="title" xsi:type="string">Dolphin MODEL</option>
</options>
<onCancel>actionDone</onCancel>
</settings>
<fieldset name="general" sortOrder="10">
<settings>
<label/>
</settings>
<field name="field1" sortOrder="10" formElement="input">
<settings>
<dataType>text</dataType>
<label translate="true">Dolphin Custom Field 1</label>
<dataScope>dwsfield1</dataScope>
<validation>
<rule name="required-entry" xsi:type="boolean">false</rule>
</validation>
</settings>
</field>
<field name="field2" sortOrder="20" formElement="textarea">
<settings>
<label translate="true">Dolphin Custom Field 2</label>
<dataType>text</dataType>
<dataScope>dwsfield2</dataScope>
</settings>
</field>
</fieldset>
</modal>
</form>
In the above code, we have two main tags- settings and modal tag. While declaring the button, we defined a class for it. This class will be used to make that button functional.
Step 2: Create a block class
Create block class file AddModelButton.php in app/code/Dolphin/Sliding/Block/Adminhtml/Product/Edit folder with the following code.
<?php

namespace Dolphin\Sliding\Block\Adminhtml\Product\Edit;

use Magento\Framework\View\Element\UiComponent\Control\ButtonProviderInterface;

class AddModelButton implements ButtonProviderInterface
{
    public function getButtonData()
    {
        return [
            'label' => __('Dolphin Panel'),
            'class' => 'action-secondary',
            'data_attribute' => [
                'mage-init' => [
                    'Magento_Ui/js/form/button-adapter' => [
                        'actions' => [
                            [
                                'targetName' => 'product_form.product_form.test_model',
                                'actionName' => 'toggleModal'
                            ]
                        ]
                    ]
                ]
            ],
            'on_click' => '',
            'sort_order' => 10
        ];
    }
}
Now execute the below command:
php bin/magento s:up
php bin/magento s:d:c
php bin/magento s:s:d -f
php bin/magento c:c
Result:
I Hope, This instruction will be helpful for you.
Happy Coding with magento2!! 🙂
If you have any difficulties regarding this blog, do consider posting them in the Comments section below!
I’m here to help.
Thank you!

We can help you with
- Dedicated Team
- Setup Extended Team
- Product Development
- Custom App Development
Our Offices

AHMEDABAD (INDIA)
B-203, B-204, Empire Business Hub, Science City Road, Sola, Ahmedabad – 380060

BERLIN (GERMANY)
Badensche Str. 28, 10715 Berlin, Germany

CALIFORNIA (USA)
9601 Reseda Blvd, Apt#223, Northridge CA-91324, USA

ALBERTA (CANADA)
302 Skyview Ranch Drive NE, Calgary, Alberta, Canada T3N0P5


