---
title: "How To Add Custom router in Magento2"
url: "https://dolphinwebsolution.com/how-to-add-custom-router-in-magento2"
date: "2023-05-06T04:33:43+05:30"
modified: "2023-08-29T06:32:23+05:30"
author:
name: "Jigar Patel"
categories:
- "Magento"
word_count: 793
reading_time: "4 min read"
summary: "In this article, we will talk to create a custom router in Magento 2.A router is a PHP class responsible for matching and processing of the URL request. In order to add custom router in lib/interna..."
description: "In this article, we will talk to create a custom router in Magento 2.A router is a PHP class responsible for matching and processing of the URL request. In o..."
keywords: "Magento"
language: "en"
schema_type: "Article"
related_posts:
- title: "Why Magento is best for other eCommerce platforms?"
url: "https://dolphinwebsolution.com/reasons-why-magento-over-other-ecommerce-platforms"
- title: "How to Create Cron Job Programmatically in magento 2"
url: "https://dolphinwebsolution.com/how-to-create-cron-job-programmatically-in-magento-2"
- title: "How to Add Custom Tab in Product Page Magento 2"
url: "https://dolphinwebsolution.com/how-to-add-custom-tab-in-product-page-magento-2"
---
# How To Add Custom router in Magento2
_Published: May 6, 2023_
_Author: Jigar Patel_
In this article, we will talk to **create a custom router in Magento 2**.A router is a PHP class responsible for matching and processing of the URL request. In order to add custom router in **lib/internal/Magento/Framework/App/RouterList.php** we need to add our configuration for the new router in **di.xml** module.
## Steps to Add Custom Router in Magento2
We are already learned [how to create a basic module in Magento 2](https://dolphinwebsolution.com/how-to-create-module-in-magento-2). We need to create **module.xml** and **registration.php** files. You can create **module.xml** and **registration.php** from this tutorial.
Here we use **Dolphin** as the Vendor name and **Customize** as the module’s name. You can change this according to your Vendor and Module name.
#### Step 1: Create a di.xml File
Now we create a di file **di.xml** in **app/code/Dolphin/Customize/etc/frontend** folder with the following code.
```
-
- Dolphin\Customize\Controller\Router
- false
- 40
```
#### Step 2: Create a custom router class
Now we create a class file **Router.php** in **app/code/Dolphin/Customize/Controller** folder with the following code.
```
actionFactory = $actionFactory;
$this->response = $response;
}
/**
* @param RequestInterface $request
* @return ActionInterface|null
*/
public function match(RequestInterface $request): ?ActionInterface
{
$identifier = trim($request->getPathInfo(), '/');
if (strpos($identifier, 'video') !== false) {
$request->setModuleName('dolphin');
$request->setControllerName('index');
$request->setActionName('index');
$request->setParams([
'first_param' => 'first_value',
'second_param' => 'second_value'
]);
return $this->actionFactory->create(Forward::class, ['request' => $request]);
}
return null;
}
}
```
**Step 3: Create a routes.xml file**
Now we create a routes file **routes.xml** in **app/code/Dolphin/Customize/etc/frontend** folder with the following code.
```
```
**Step 4: Create a layout file**
Now we create a layout file **dolphin\_index\_index.xml** in **app/code/Dolphin/Customize/Controller** folder with the following code.
```
Dolphin Video Page
```
**Step 5: Create a controller class**
Now we create a class file **Index.php** in **app/code/Dolphin/Customize/Controller/Index** folder with the following code.
```
pageFactory = $pageFactory;
$this->request = $request;
}
/**
* @inheritdoc
*/
public function execute()
{
// Get the params that were passed from our Router
$firstParam = $this->request->getParam('first_param', null);
$secondParam = $this->request->getParam('second_param', null);
return $this->pageFactory->create();
}
}
```
**Now execute the below command:**
**php bin/magento s:up**
**php bin/magento s:d:c**
**php bin/magento s:s:d -f**
**php bin/magento c:c**
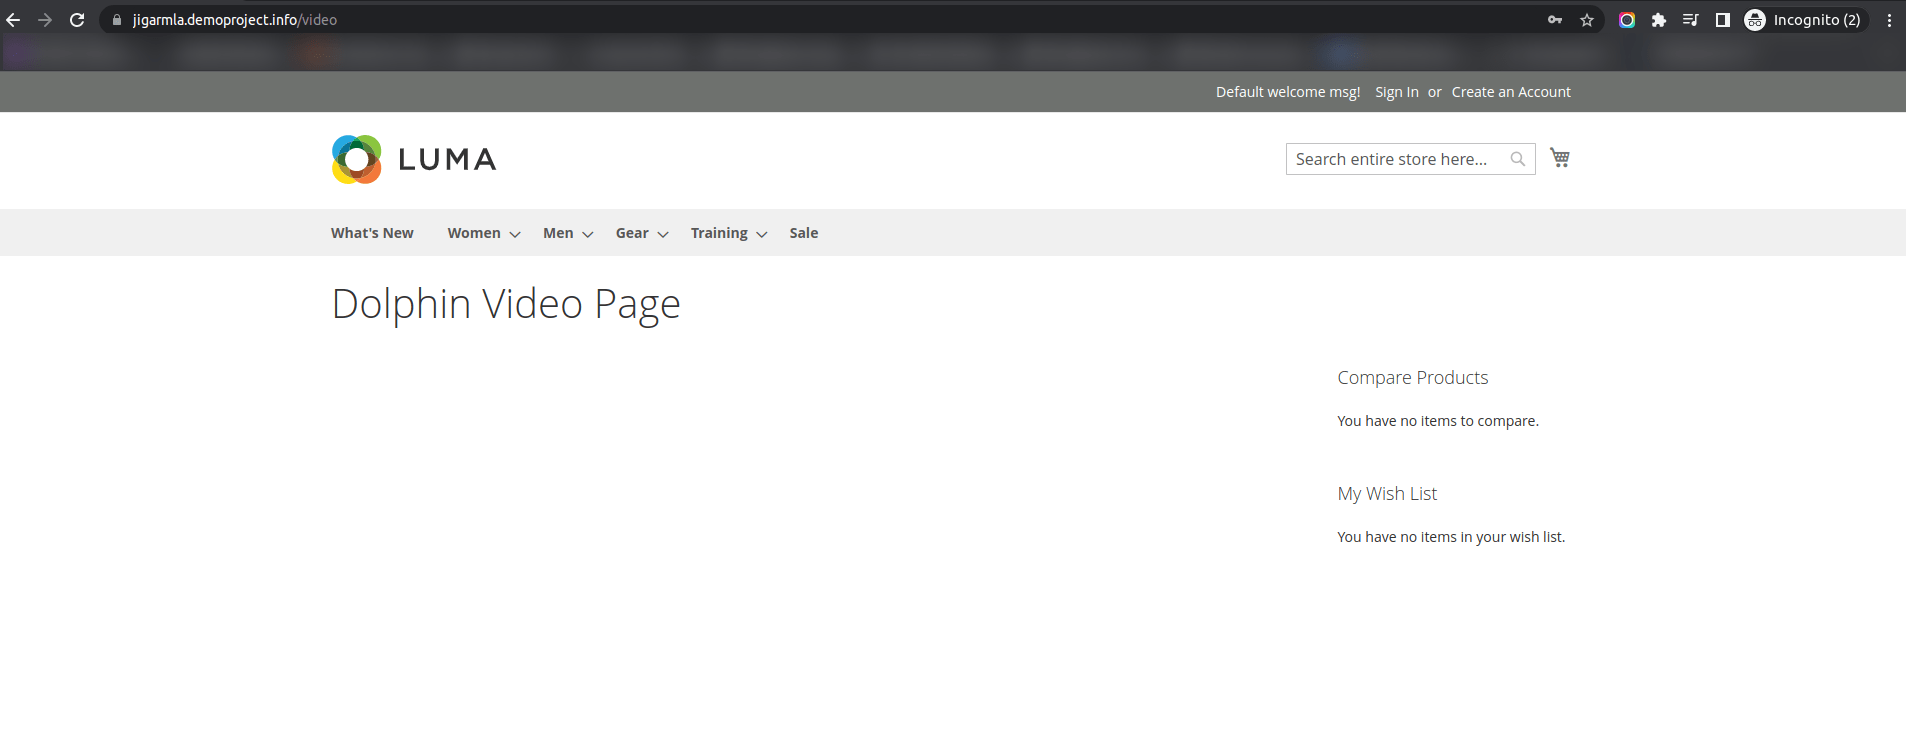
**Result:**
**Accessing https://jigarmla.demoproject.info/video route,
The https://jigarmla.demoproject.info/dolphin/index/index route is loaded.**
I Hope, This instruction will be helpful for you.
**Happy Coding with magento2!! ?**
If you have any difficulties regarding this blog, do consider posting them in the Comments section below!
I’m here to help.
Thank you!
---
_View the original post at: [https://dolphinwebsolution.com/how-to-add-custom-router-in-magento2](https://dolphinwebsolution.com/how-to-add-custom-router-in-magento2)_
_Served as markdown by [Third Audience](https://github.com/third-audience) v3.5.3_
_Generated: 2026-08-26 06:54:26 UTC_