---
title: "How To Add Custom Button In System Configurations Magento 2"
url: "https://dolphinwebsolution.com/how-to-add-custom-button-in-system-configurations-magento-2"
date: "2021-12-13T10:58:08+05:30"
modified: "2023-08-25T08:58:32+05:30"
author:
name: "Jigar Patel"
categories:
- "Magento"
word_count: 945
reading_time: "5 min read"
summary: "Adding a custom button in the system configuration is a quite common task when creating a custom module. Quaternary buttons are only after all the buttons hierarchy have been used.
The system.xm..."
description: "Adding a custom button in the system configuration is a quite common task when creating a custom module. Quaternary buttons are only after all the buttons hi..."
keywords: "custom button in system configuration,add custom button magento 2, Magento"
language: "en"
schema_type: "Article"
related_posts:
- title: "How to add/remove column and other DB operations to table in Magento 2.3 using declarative schema?"
url: "https://dolphinwebsolution.com/how-to-add-remove-column-and-other-db-operations-to-table-in-magento-2-3-using-declarative-schema"
- title: "How to Add a Custom field at Product Form Magento 2"
url: "https://dolphinwebsolution.com/how-to-add-a-custom-field-at-product-form-page-magento-2"
- title: "Magento: How to implement custom indexing within flash time?"
url: "https://dolphinwebsolution.com/magento-how-to-implement-custom-indexing-within-flash-time"
---
# How To Add Custom Button In System Configurations Magento 2
_Published: December 13, 2021_
_Author: Jigar Patel_

Adding a custom button in the system configuration is a quite common task when creating a custom module. [**Quaternary buttons**](https://developer.adobe.com/commerce/admin-developer/pattern-library/controls/buttons/) are only after all the buttons hierarchy have been used.
The system.xml is a configuration file that is used to create configuration fields in Magento 2 System Configuration.
Button in System Config can be used to launch different actions of your extension. In our case, the button will call some controller via Ajax and return some results.
**Read This:** [How To Add Split Button on Admin Page in Magento 2](https://dolphinwebsolution.com/how-to-add-split-button-on-admin-page)
We are already learned [how to create a basic module in Magento 2](https://dolphinwebsolution.com/how-to-create-basic-module-in-magento-2). We need to create **module.xml** and **registration.php** file. You can create **module.xml** and **registration.php** from this tutorial.
Here we are using **Dolphin** as Vendor name and **InvoiceEmail** as the name of a module. You can change this according to your Vendor and Module name.
#### Step 1: Create System XML
Create system config file **system.xml** in **app/code/Dolphin/InvoiceEmail/etc/adminhtml** folder with the following code.
```
separator-topdolphintabDolphin_InvoiceEmail::config_extensionDolphin\InvoiceEmail\Block\Adminhtml\System\Config\Form\Button
```
#### **Step 2:** Create a Block
Create a **Button.php** file in the **app/code/Dolphin/InvoiceEmail/Block/Adminhtml/System/Config/Form** folder with the following code.
```
getLayout()->createBlock(
'Magento\Backend\Block\Widget\Button'
)->setData([
'id' => 'inventory_button',
'label' => __('Update Inventory'),
])
->setDataAttribute(
['role' => 'dolphin-update-inventory']
);
/** @var \Magento\Backend\Block\Template $block */
$block = $this->_layout->createBlock('\Dolphin\InvoiceEmail\Block\Adminhtml\System\Config\Form\Button');
$block->setTemplate('Dolphin_InvoiceEmail::system/config/form/button.phtml')
->setChild('button', $button)
->setData('select_html', parent::_getElementHtml($element));
return $block->toHtml();
}
public function getAjaxCheckUrl()
{
return $this->_urlBuilder->getUrl('updatestock/updatestock/index');
}
}
```
**$block->setTemplate()** set the button template in system config page.
#### **Step 3:** Create Template File
Create a **button.phtml** file in the **app/code/Dolphin/InvoiceEmail/view/adminhtml/templates/system/config/form** folder with the following code.
```
getChildHtml('button') ?>
```
**getAjaxCheckUrl()** method return ajax url from **Button Block**.
Now execute the below command and refresh the page:
```
[dt_highlight color="" text_color="" bg_color=""]php bin/magento s:up[/dt_highlight]
[dt_highlight color="" text_color="" bg_color=""]php bin/magento c:c[/dt_highlight]
```
**Result :**
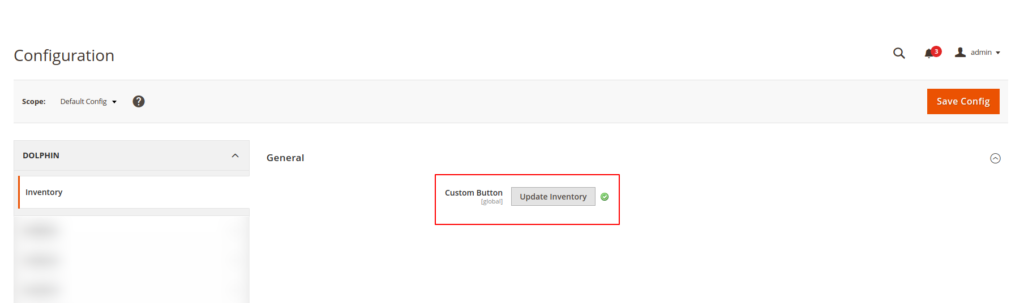
You check it also in vendor/magento/module-customer/etc/adminhtml/system.xml for the button. Below code check it in the above path. Create frontend\_model like this vendor/magento/module-customer/Block/Adminhtml/System/Config/Validatevat.php.
```
Validate VAT NumberMagento\Customer\Block\Adminhtml\System\Config\Validatevat
```
Above path for your reference.
I Hope, This instruction will be helpful for you.
If you have any difficulties regarding this blog, do consider them posting in the Comments section below!
**Thank you!**
---
_View the original post at: [https://dolphinwebsolution.com/how-to-add-custom-button-in-system-configurations-magento-2](https://dolphinwebsolution.com/how-to-add-custom-button-in-system-configurations-magento-2)_
_Served as markdown by [Third Audience](https://github.com/third-audience) v3.5.3_
_Generated: 2026-08-26 06:54:46 UTC_
 ?>)
 ?>) ```
**getAjaxCheckUrl()** method return ajax url from **Button Block**.
Now execute the below command and refresh the page:
```
[dt_highlight color="" text_color="" bg_color=""]php bin/magento s:up[/dt_highlight]
[dt_highlight color="" text_color="" bg_color=""]php bin/magento c:c[/dt_highlight]
```
**Result :**

You check it also in vendor/magento/module-customer/etc/adminhtml/system.xml for the button. Below code check it in the above path. Create frontend\_model like this vendor/magento/module-customer/Block/Adminhtml/System/Config/Validatevat.php.
```
```
**getAjaxCheckUrl()** method return ajax url from **Button Block**.
Now execute the below command and refresh the page:
```
[dt_highlight color="" text_color="" bg_color=""]php bin/magento s:up[/dt_highlight]
[dt_highlight color="" text_color="" bg_color=""]php bin/magento c:c[/dt_highlight]
```
**Result :**

You check it also in vendor/magento/module-customer/etc/adminhtml/system.xml for the button. Below code check it in the above path. Create frontend\_model like this vendor/magento/module-customer/Block/Adminhtml/System/Config/Validatevat.php.
```